So after a looooot of masking and correcting lines, I finally finished the key storage.
Note to myself, next time sand the whole thing down first, properly primer it and start working with a perfectly flat surface…that would help a lot as making straight lines in a textured surface is a major pain in the neck…
(Major pain…another HIMYM reference, for those who get it…)
I’ve given it some coats of mate varnish and covered the inside with soft padding (the one normally used below furniture or in cabinet doors/drawers to soften up the closing), and that was it. Done!
Ok, so I’m geek… You’ve probably already noticed that. 🙂 Oh, and I simply LOOVE the Star Wars universe…which you should already have noticed also..
I was gathering a bit of a collection, and I wanted a place to display all my stuff (and also protect it from my baby, and protect my baby from it – small easy-braking plastic parts are always a concern when you have a toddler wandering around).
Our office is quite small! When we purchased the house I imagined it to be the biggest room, but it ended up as being the smallest…funny how things turn out! We had to think on how to properly fit everything we wanted without making it unusable or too “crowded”. I like the end-result, but some more real estate would be nice…maybe next time, when I earn enough to purchase a house with a proper man-cave.
Well, let’s get back on-topic. As always, money is a concern, so an IKEA Besta was the solution for the cabinet. I’ve ordered some tempered glass doors cut to fit, and after some DIY tweaking I got quite a nice place to show my stuff.
Under the desk I have a switch, which transforms the office into “non-work mode”: it turns on indirect lighting on the end of the desk, a Batman sign on the wall, and I wanted also this to light the cabinet. I had some LED strips from a previous project (a cloud lamp for the baby room and also the Batman sign, soon to be featured in the blog), so the light source was chosen.
After some time working all the cabling, the end result was quite satisfying… Since I already had the led strip, the only cost was with the electrical cable (~6€), the led strip adapters (~4€) and a 12V 2.5A Power supply (~7€)! Happy times!
In the shelves you can check out some past and future projets…
One thing we’ve been lacking since day one at our house is a proper key storage. Currently they are all inside a drawer, and every time we need to find a specific key it’s a pain.
So, after giving it some thought and not really liking the options my local hardware shop had for me, I had an idea.
Chinese shops use to have (at least in Portugal) small wood boxes with no finish, just raw wood…why not use one of those to store the keys?
Ok, so the base solution is found…but I’m not using this as raw wood, I have to give it a protective coat of paint or varnish.
Then internal unease arises…There is no way I’m putting a basic coat of paint without any kind of customization… I’ve got to add some personal feel to it.
My brain starts working and after a quick research I found the answer. Why not make a R2-D2 themed box? I’ve seen some lunch boxes which transform the cilindrical form of the R2 into a box-shape, maintaining the R2 feel.
After some googling around, I’ve found these instructions to make an R2 paper robot. These gave me the ground base I needed to start working (credits in the picture).
Then painting stage begins. I have to start by saying that my painting skills are rather basic, and I did not wanted to use an airbrush or spray. I had some vinyl water based paint around – from Titan paints, really cool stuff – and I also wanted to make this project as cost effective as possible, so this was my weapon of choice. Just needed to buy one black bottle and one grey, since I already had cyan blue and white.
I wanted to base the whole artistic part with straight lines, so my initial thought was to use masking tape it order to guide the paint. I dont trust my skills to do decent curve lines… Though, since the wood surface is a bit rough, the masking tape did not attach perfectly and it caused a lot of paint bleeding in the first tries. Eventually I’ve solved the issue by giving a first coat of the base color before painting the top color. The base color seals the masking tape, not allowing the top color bleeding. The process takes twice the time, but the end result is worth it. Since drying times are of a couple of minutes, it takes some time but Its feasible. The last few nights after the baby is asleep had been dedicated to this.
I’m currently finishing the (first) front panel. I know it’s not very detailed, but it’s giving me way too much trouble as it is…and I’m kind of happy with the way it’s coming.
The first shapes took me some extra time to fine tune as some were crooked and had to be corrected… I’m hoping the following ones can be quicker as I perfect the process.
More to come soon.
BTW, 3M masking tape is really great…
Take care out there…
After finishing the “test” diorama, I though I was OK for going towards the main goal.
The first step was shaping the big AT-AT, such as turning the head slightly to the side and filling the base of the raised food with the bottom part of a bottle cap. Regarding the snowspeeders, the idea was to improve the original diorama design by placing one flying around the AT-AT with the cable and another one crashed on the snow. For the one which was flying I’ve added a pilot made of miliput and the one crashed had the canopy modded so it can be left open. I’ve also made a miliput leg print, so I can leave some AT-AT steps on the snow. In the photos is also visible one F-toys Tydirium, which I also primed and painted together with the rest of the ships.
The process for painting all the ships was the same:
airbrush primer with Vallejo white primer
airbrush with Tamiya paints (dilluted 1:2 with Tamiya thinner)
airbrushing with Vallejo gloss finish
add MIG washes (Neutral wash for the Tydirium and Snowspeeders, Dark and Brown for the AT-AT)
airbrush with Vallejo mate finish
For the colors, I’ve did some research, mostly in RPF forum. I did wanted to use Tamiya colors since they’re easier to find:
AT-AT: XF-66
Tydirium: mix of XF-19 and white (XF-2)
Snowspeeder: mix of XF-19 and white (XF-2), but with a “lighter” mix
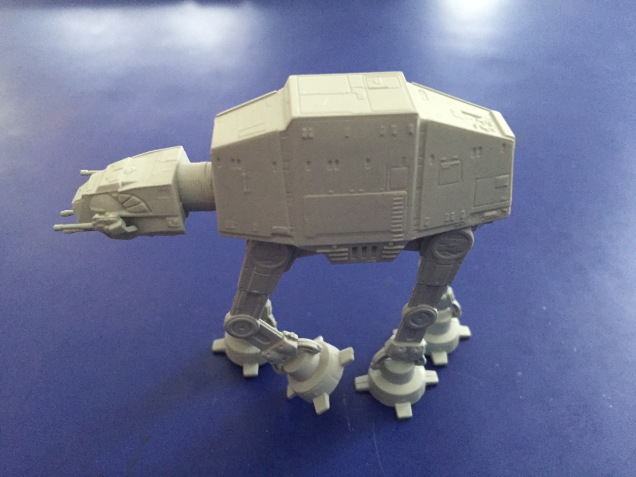
This is AT-AT after all the paint, weathering and finishing steps.
Finished AT-AT
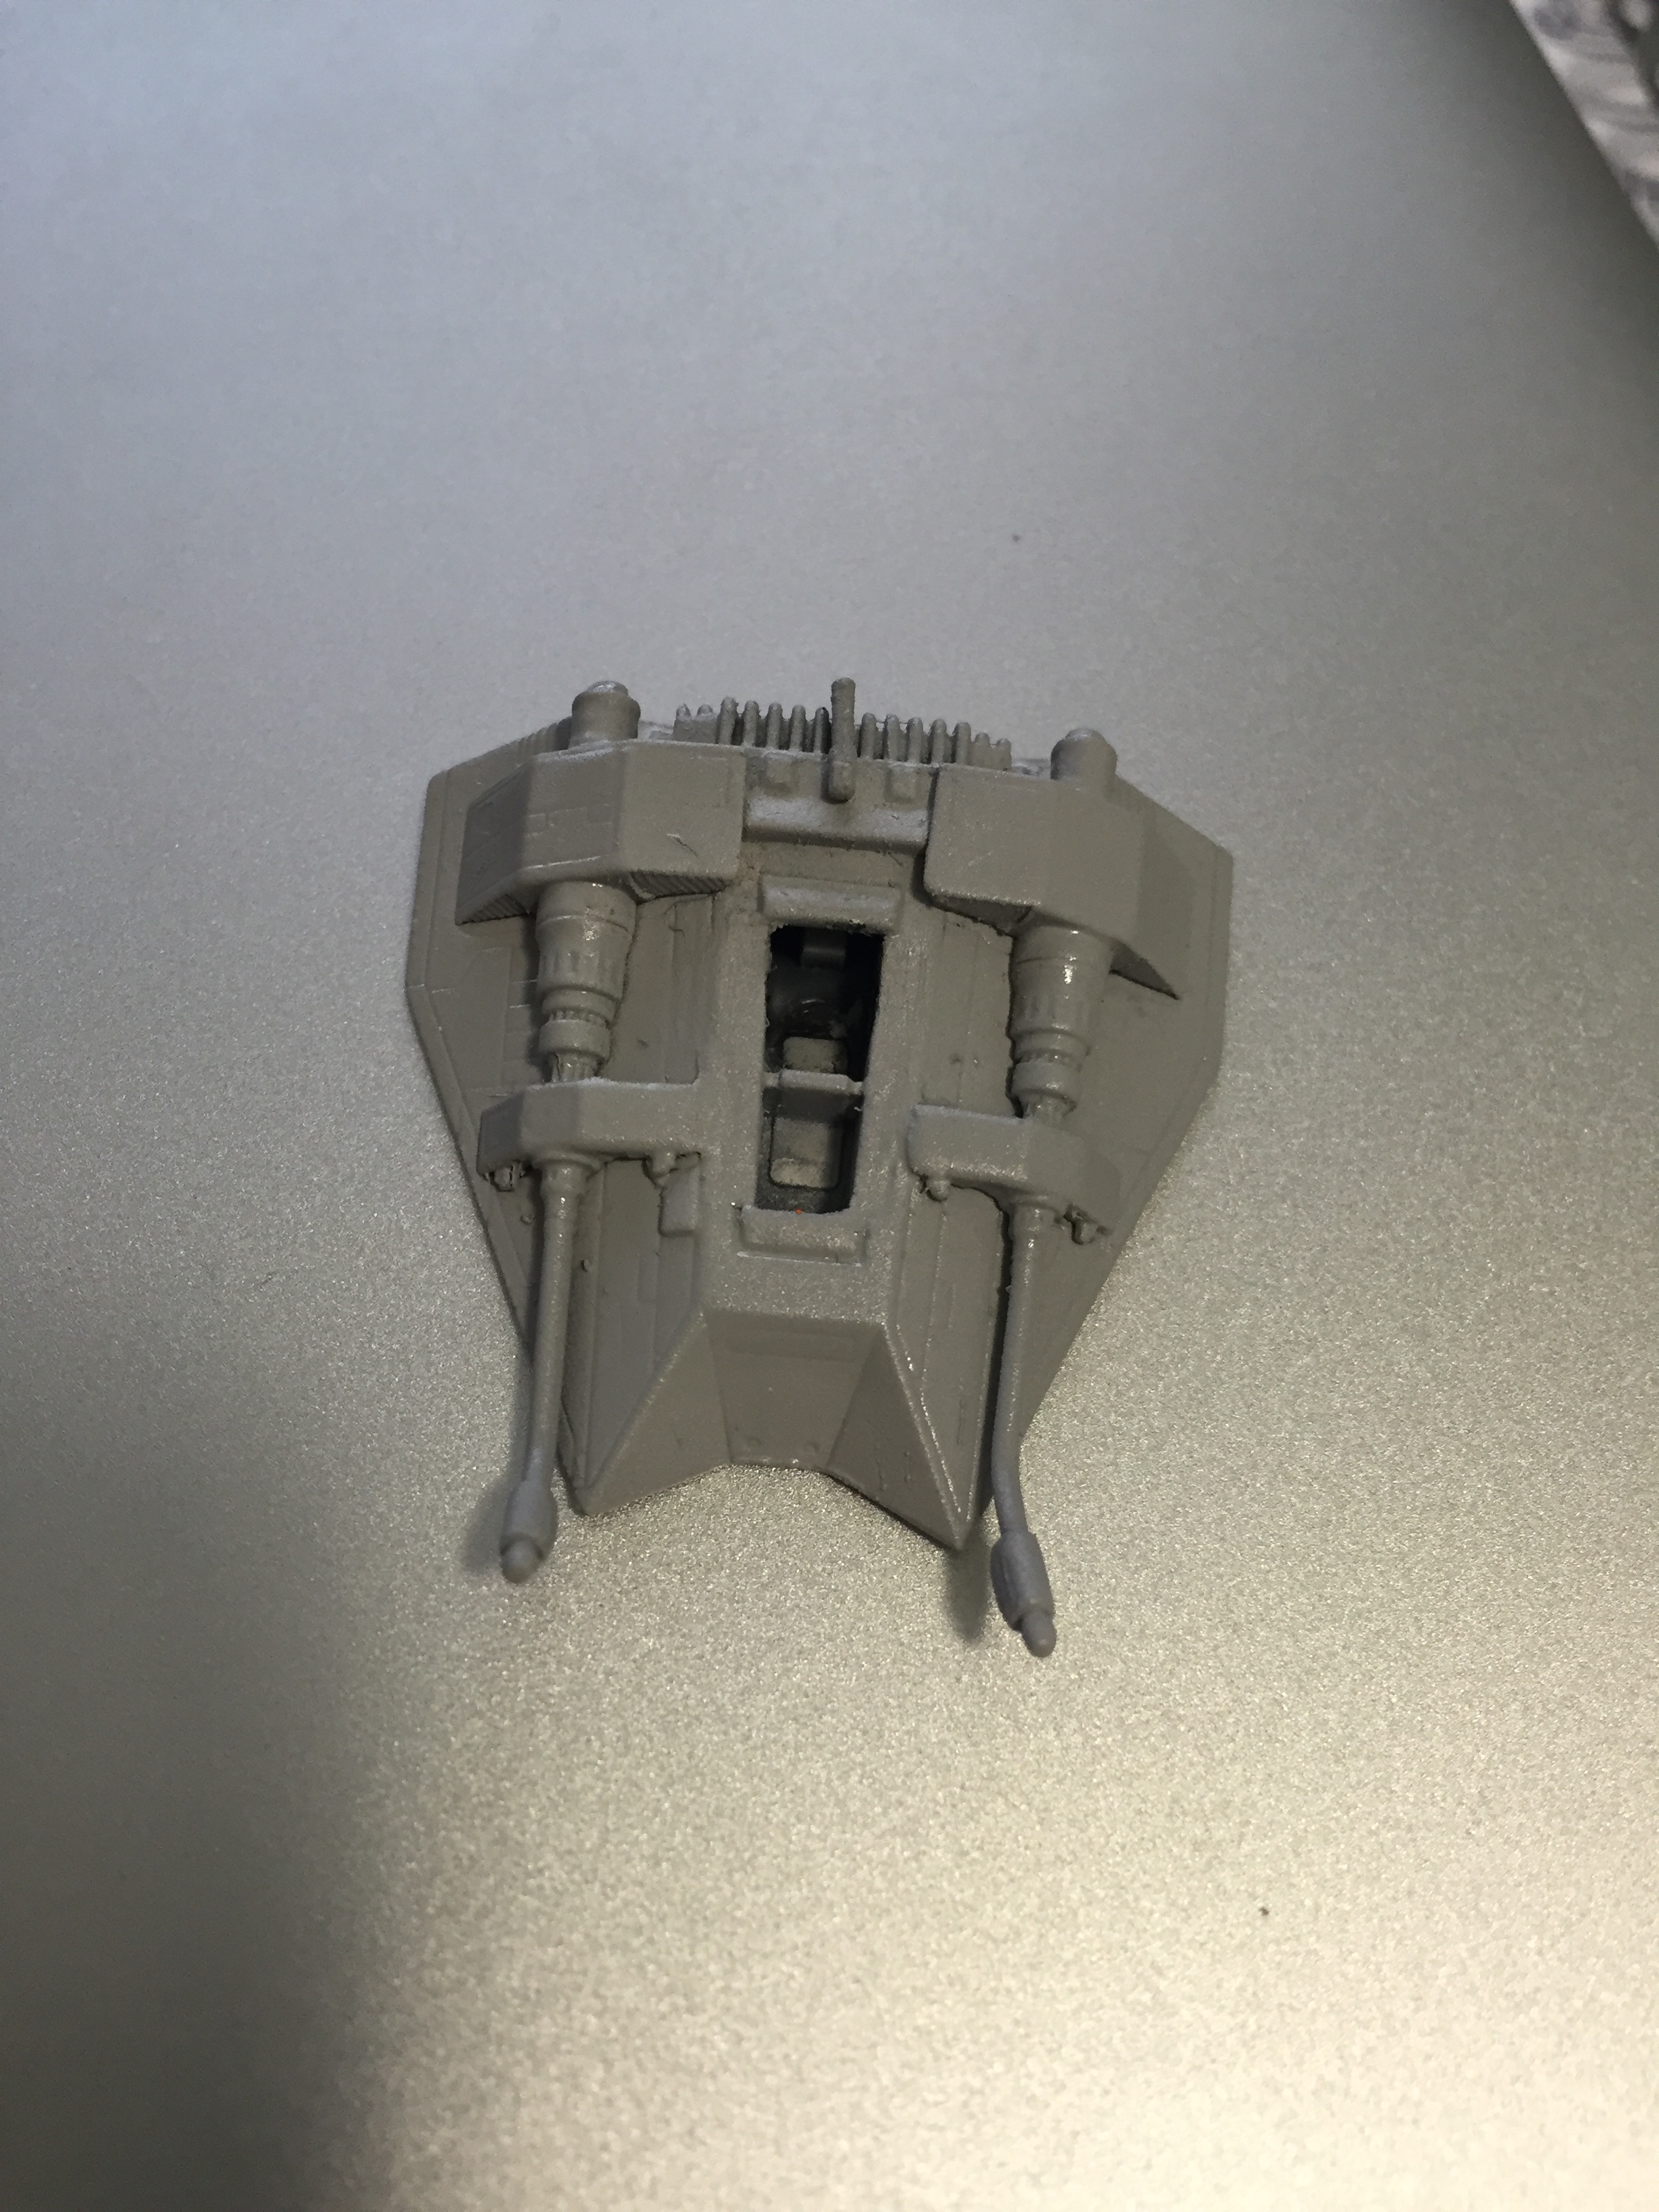
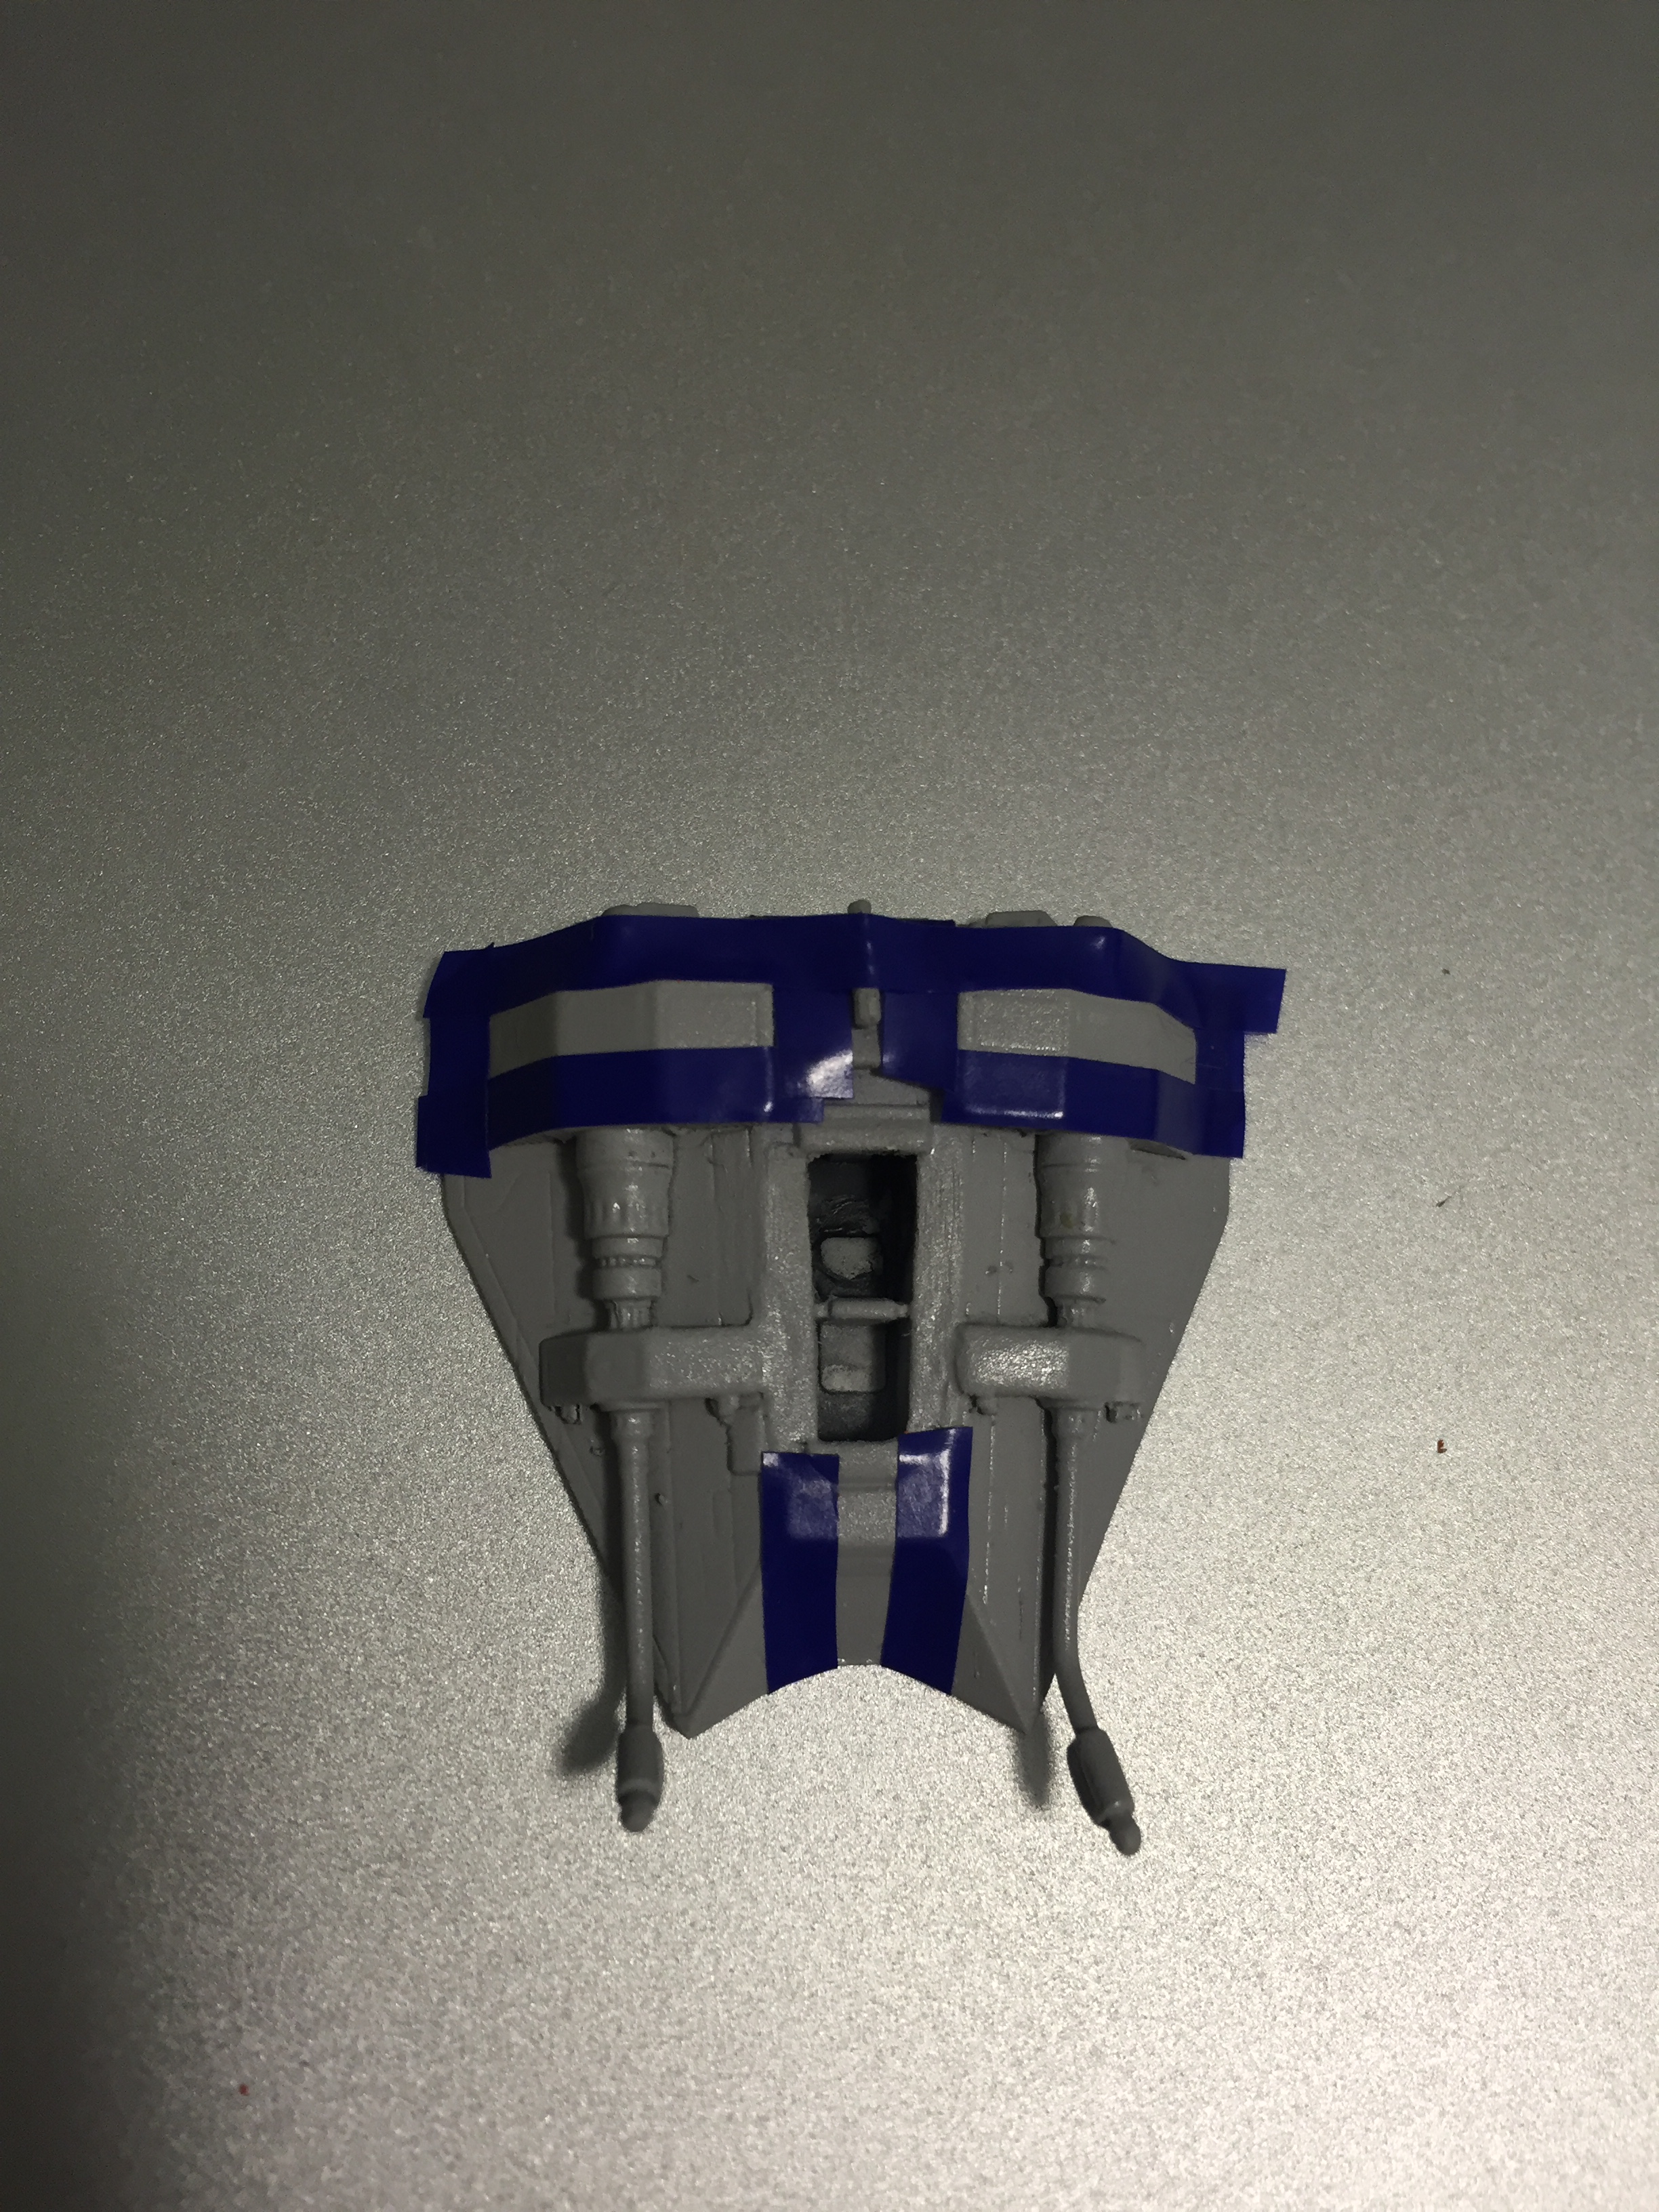
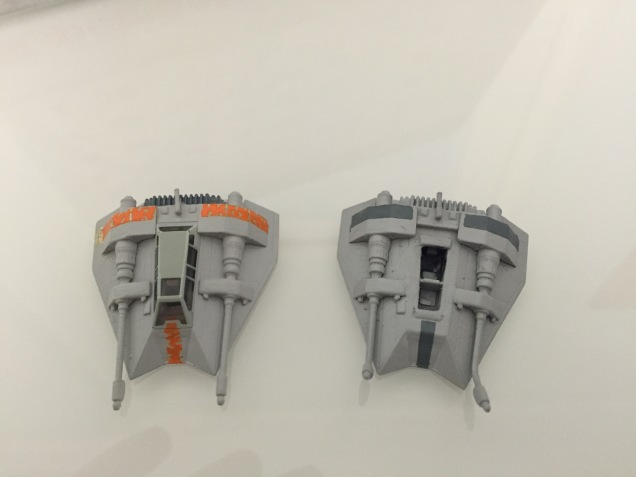
Regarding the speeders, first step was to carve some scratches before the primer, and after applying the base paint coat I’ve hand painted the dark grey and orange stripes.
The next step was to add the chipping effect to the stripes, in order to give it a more weathered look and add some texture for the washes to grab into.
Orange speeder after and grey speeder before stripes chipping effect.
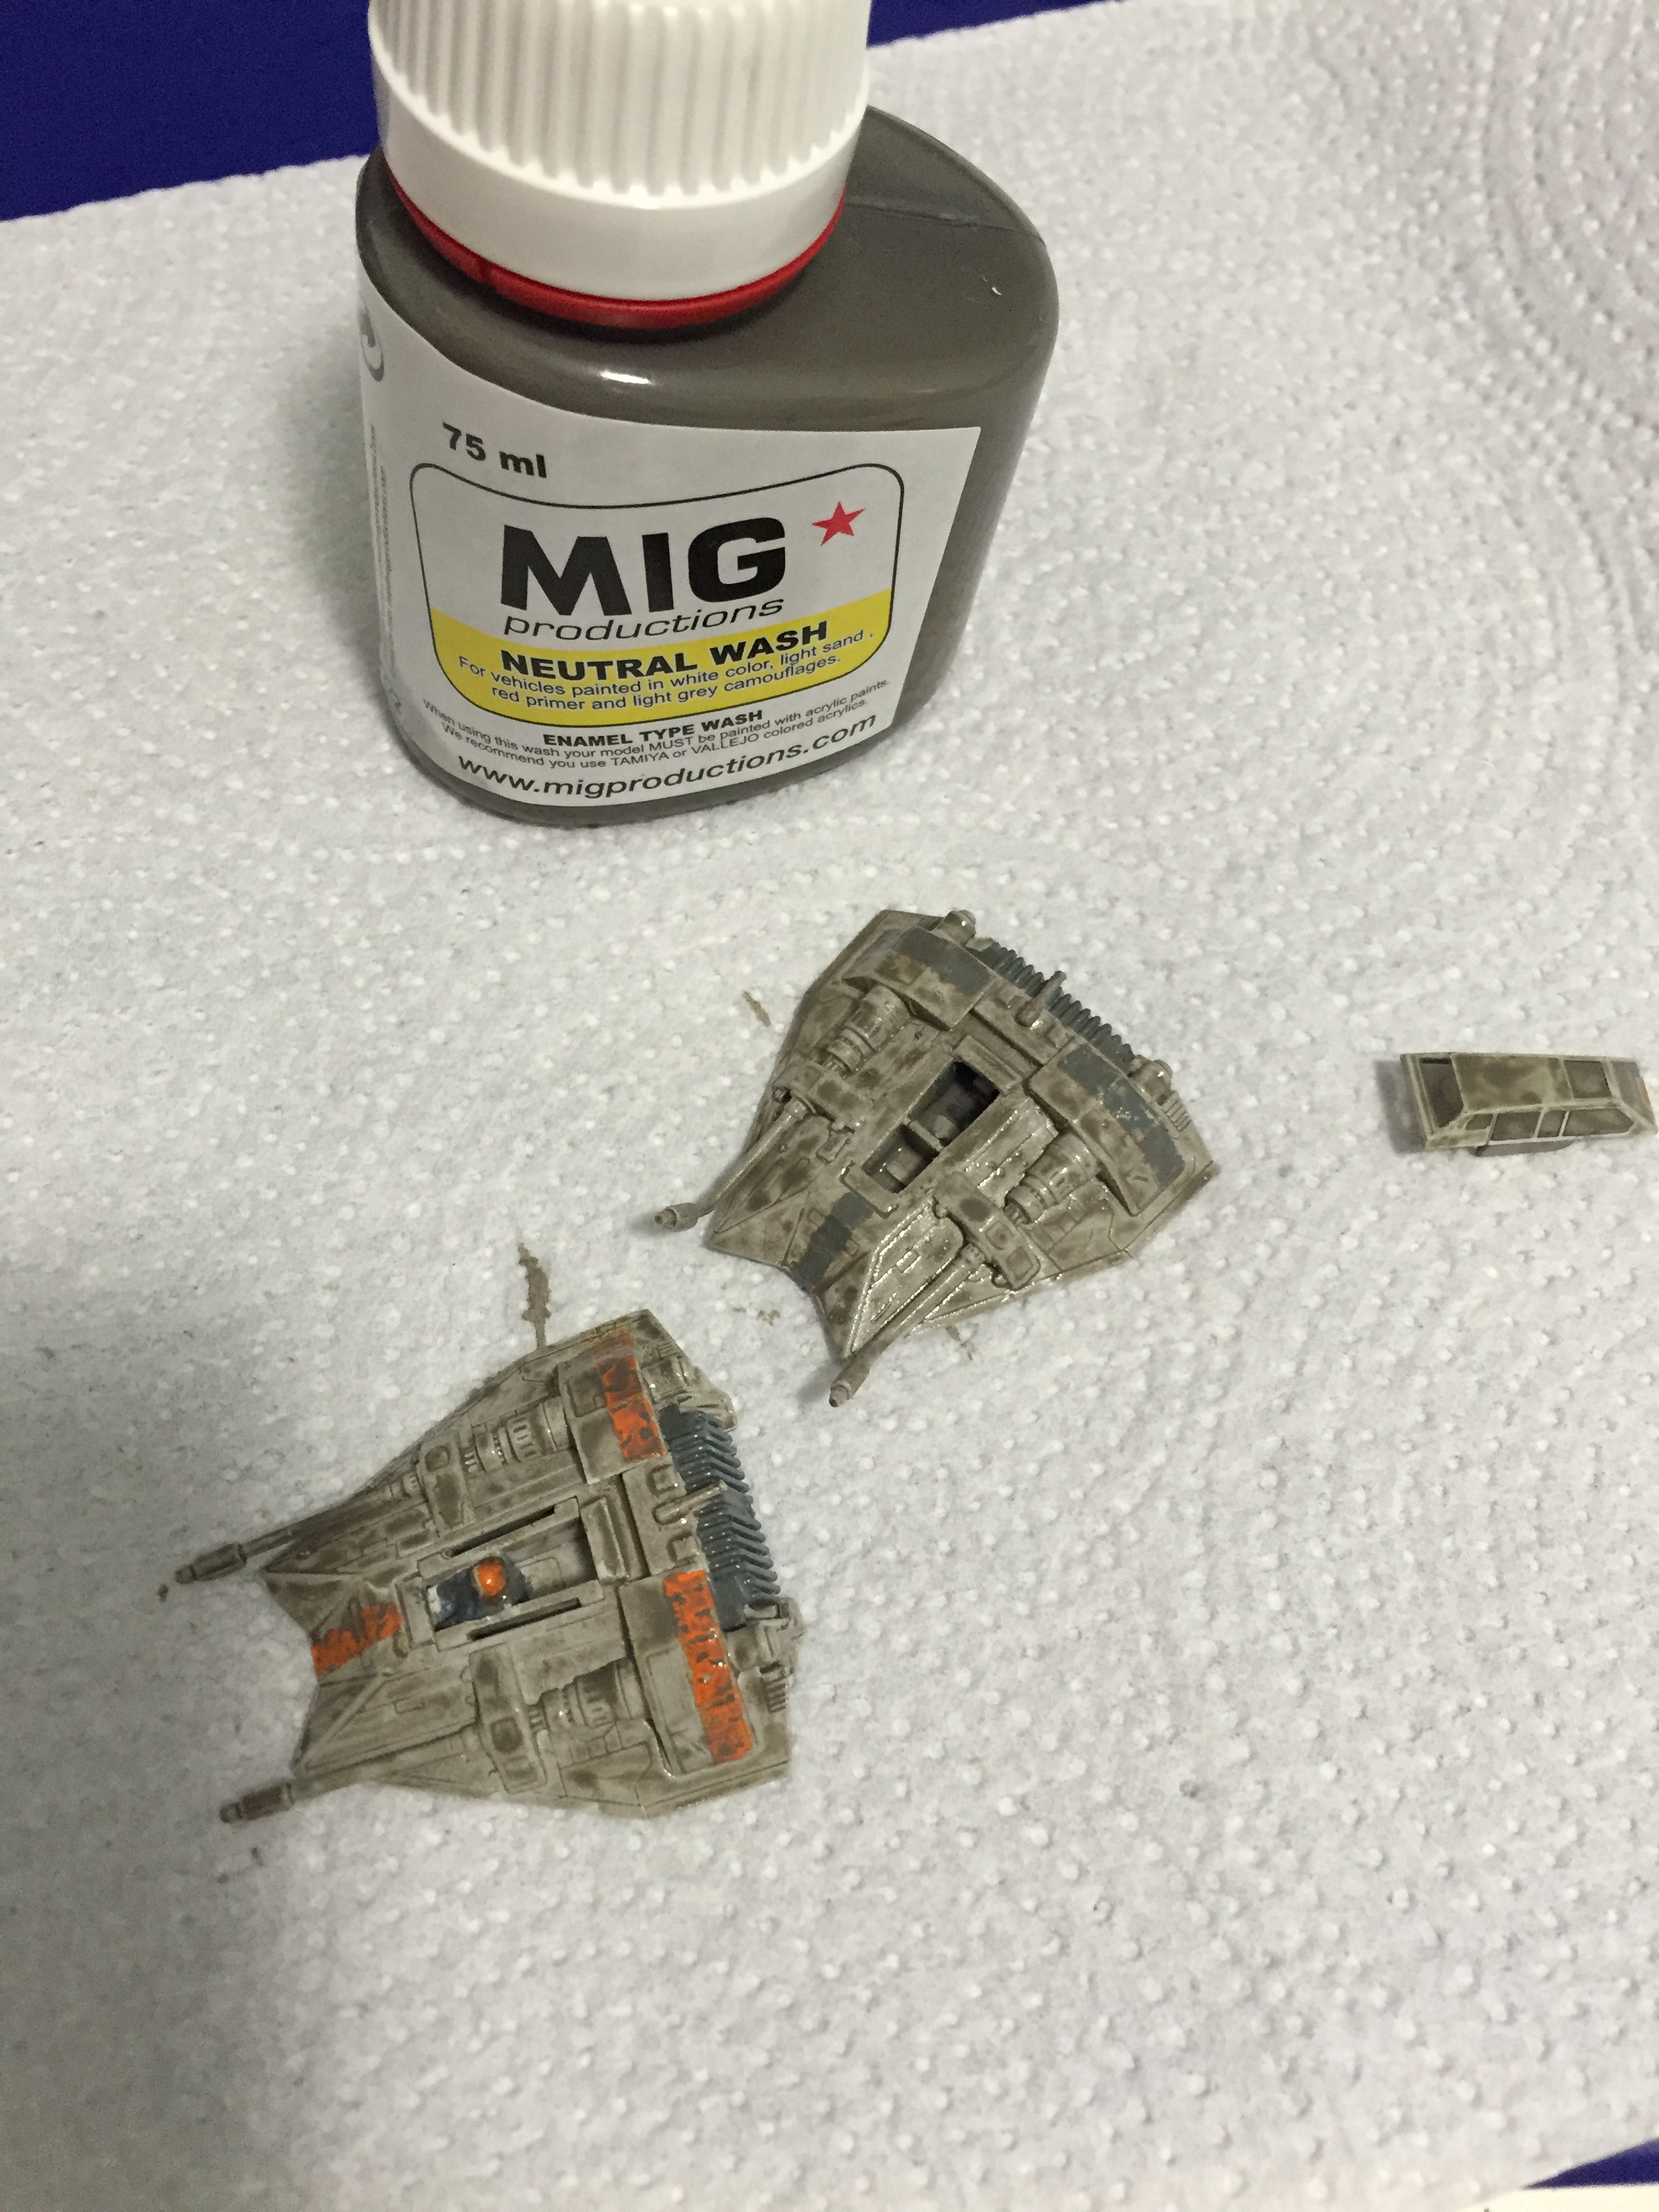
The last steps was to add the MIG Neutral wash and seal with the matt varnish.
Adding MIG Neutral Wash
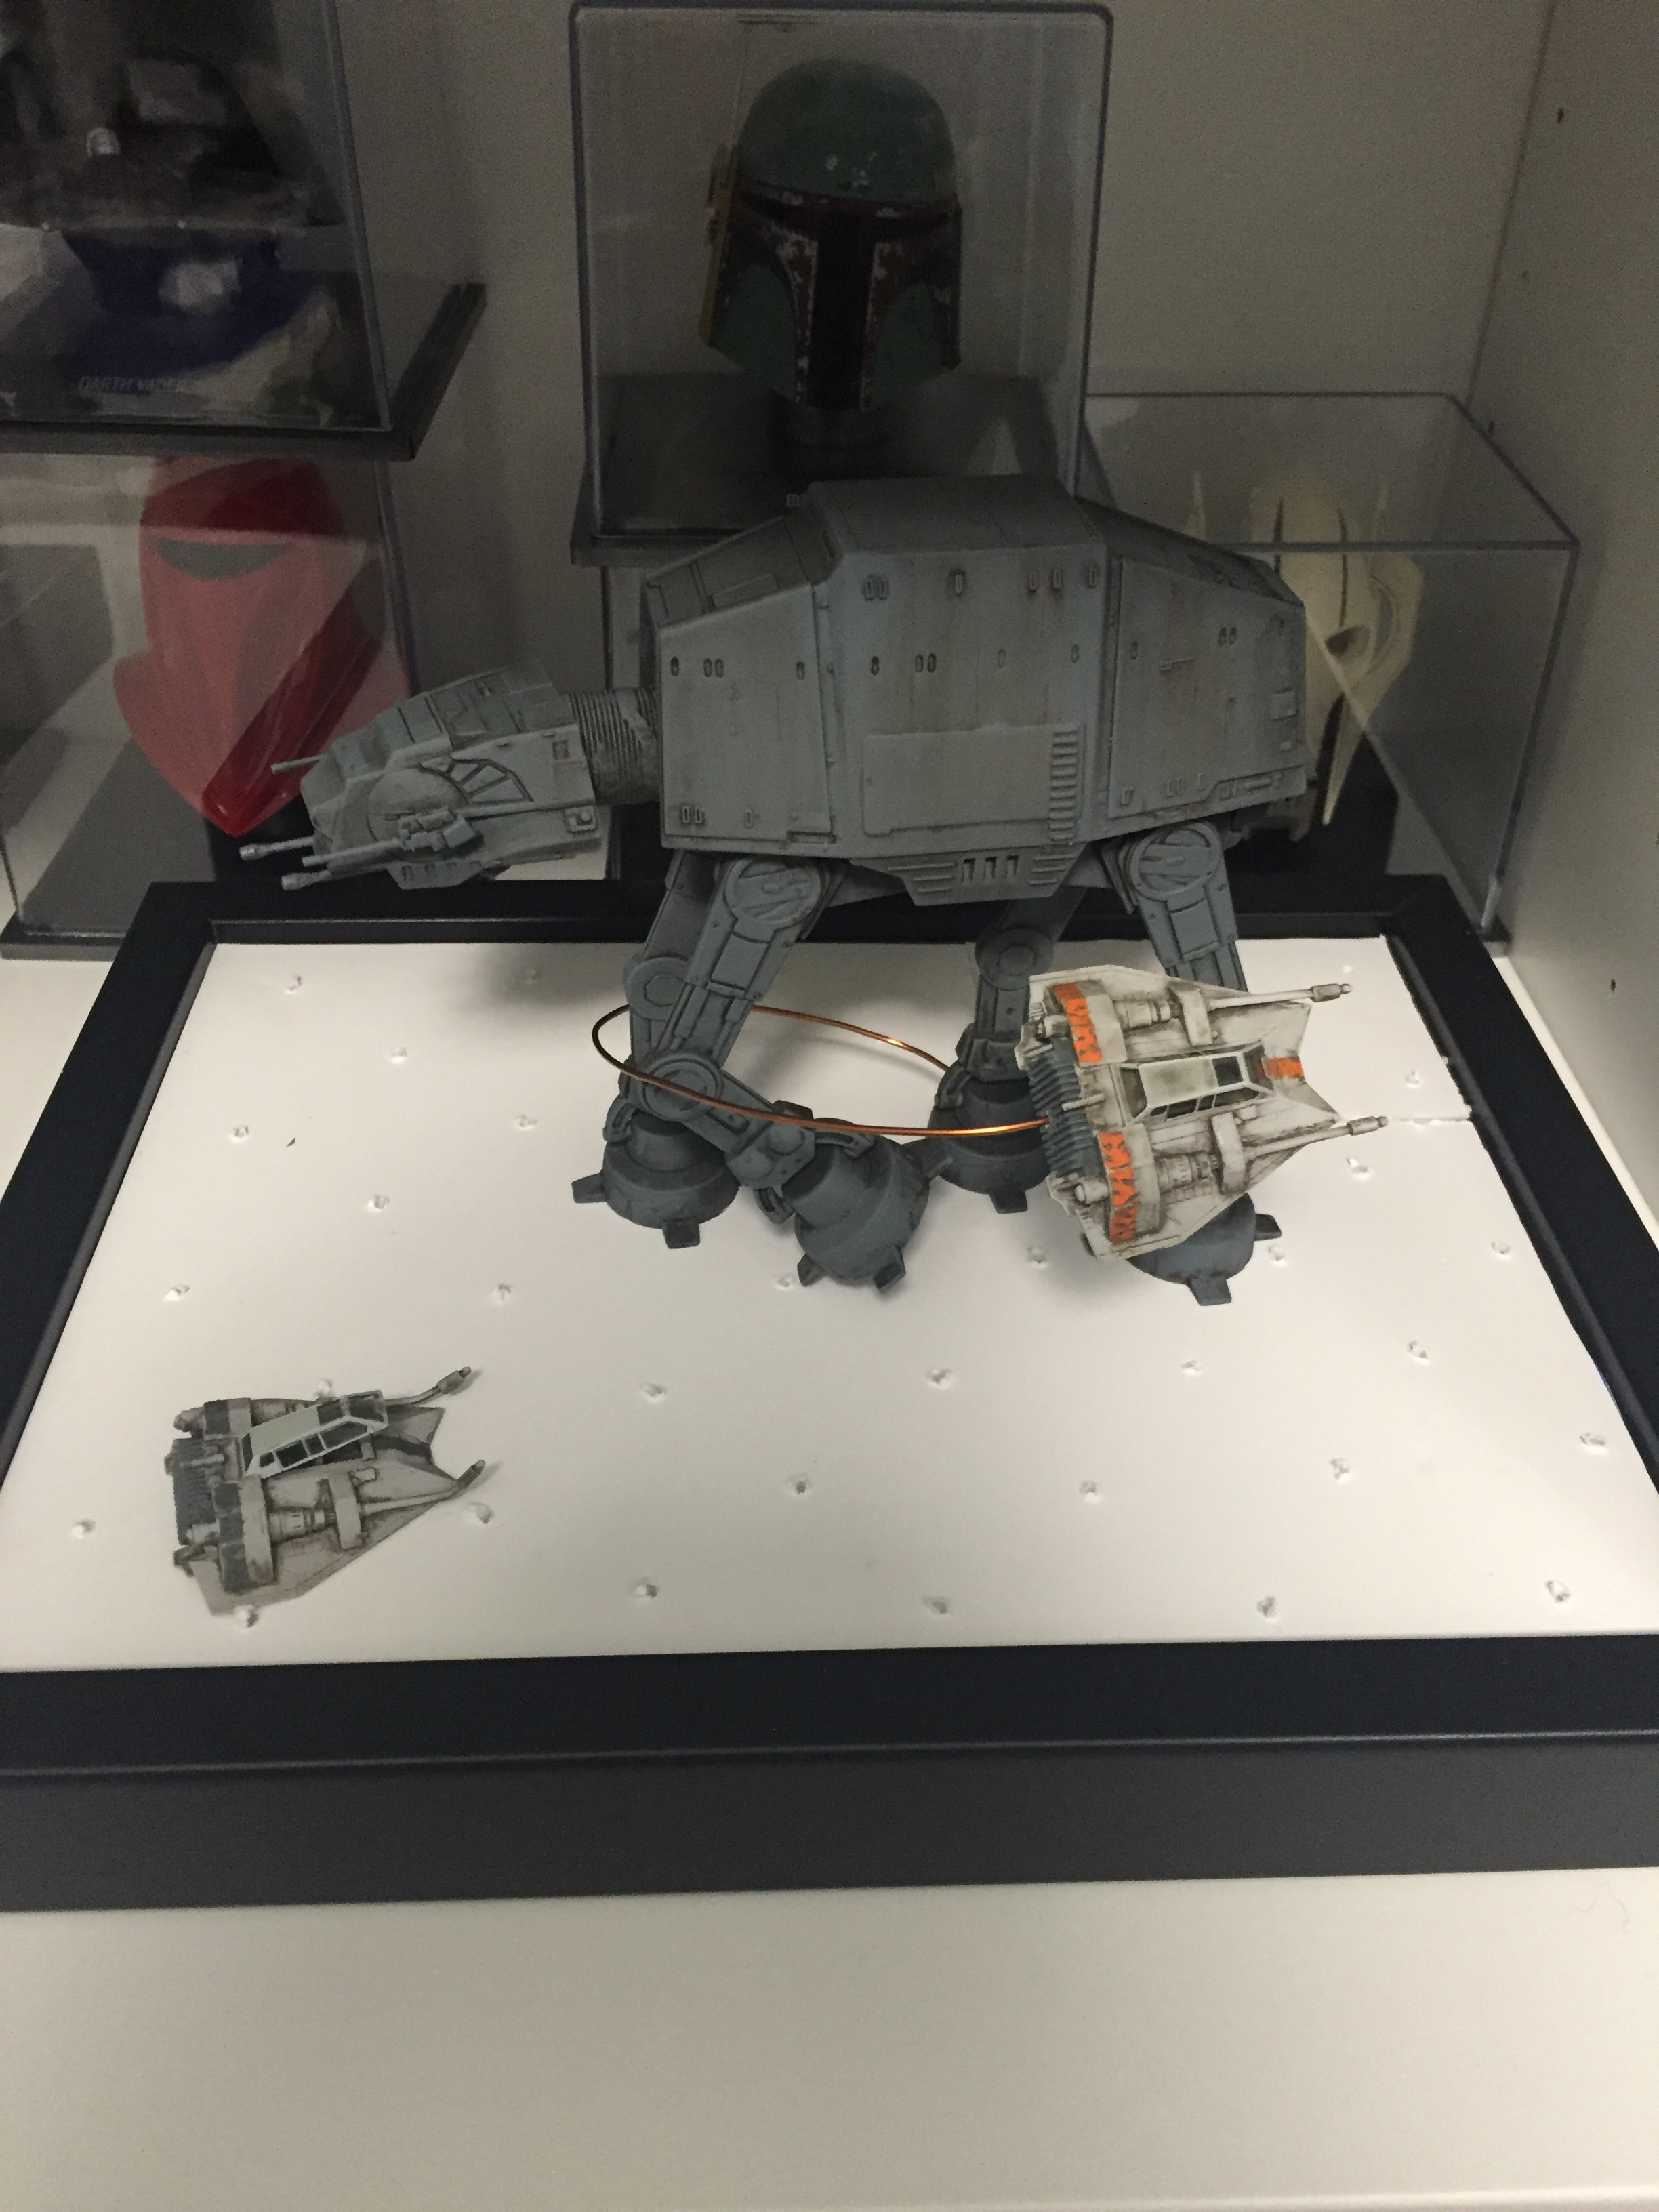
Regarding the first small diorama, I’ve made some changes. Since the original glue turned the snow a bit yellow, I decided on buying some appropriate materials for the new diorama, namely a bottle ~1/2 L of Woodland Scenics Scenic Cement. With a brush I’ve layed some of this cement on the top of the yellowed snow and poured some flakes on the top. I think it solved the issue, and gave the snow a more realistic and textured look. I think this is finally finished apart for some pigment work.
Finished small diorama.
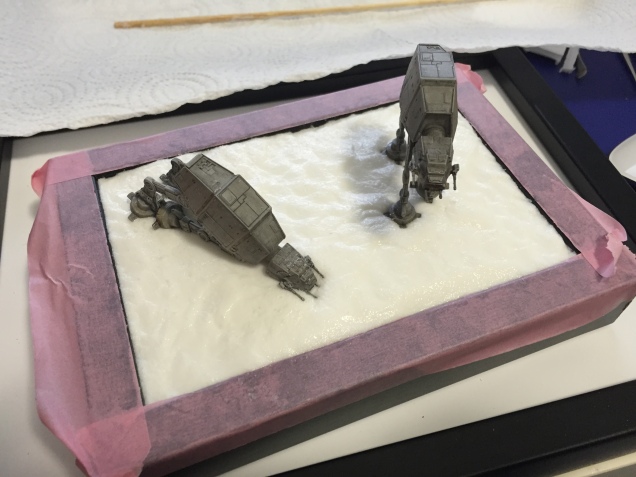
Now it is time to “marry” the AT-AT with the Snowspeeder. I’ve used a piece of copper wire (used for coil windings), drilled one small hole in the AT-AT food and another on the back of the snowspeeder. To give it a bit more strength, I’ve twisted the wire inside the AT-AT food and filled it with hot glue, so it does’t move and provides a stable base. For the crashed snowspeeder, I’ve glued the canopy open and twisted the cannons a little bit for a more damaged look. Below the mock-up before adding the snow.
Mock-up before the snow
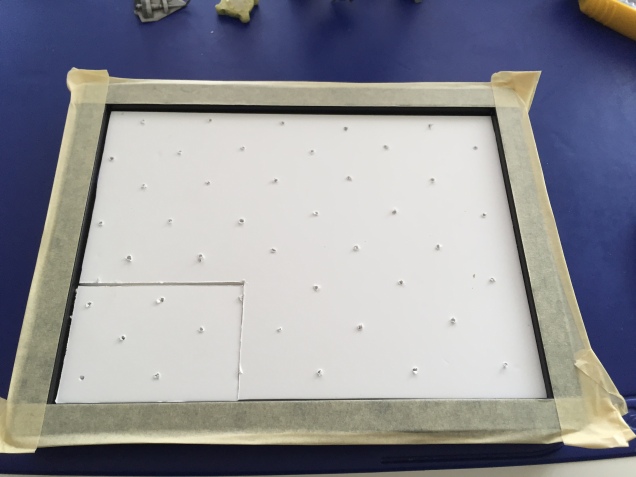
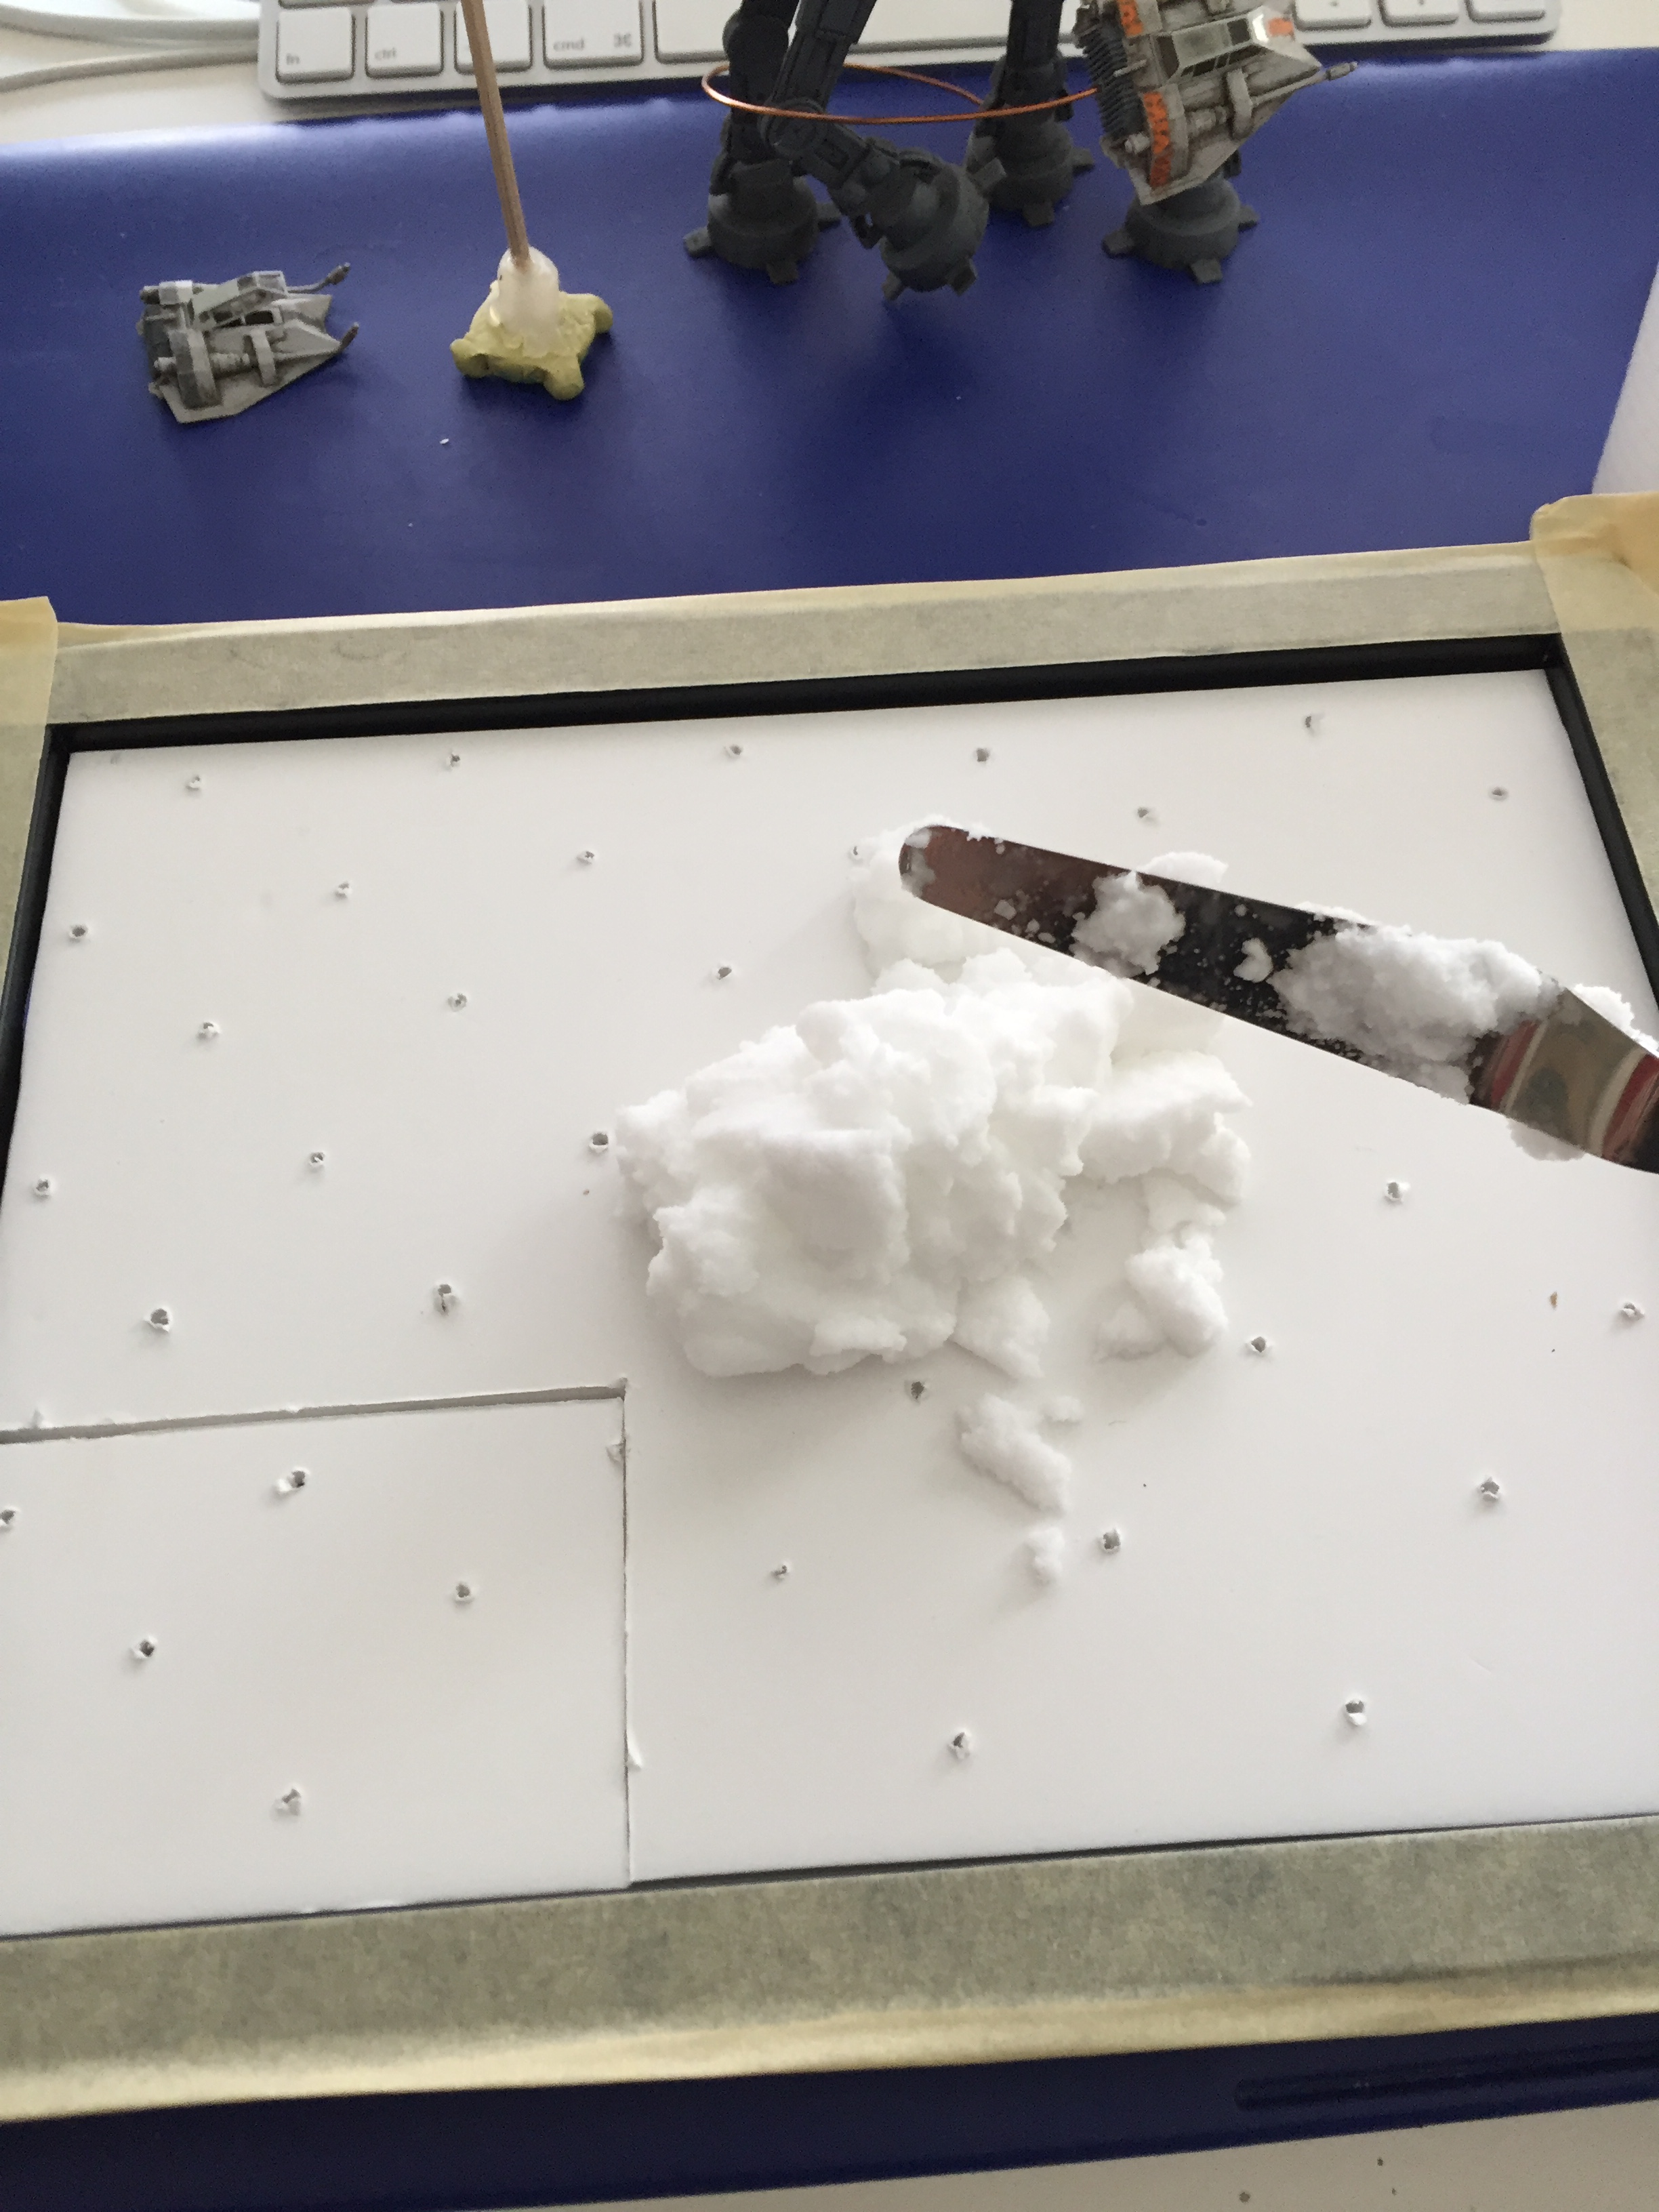
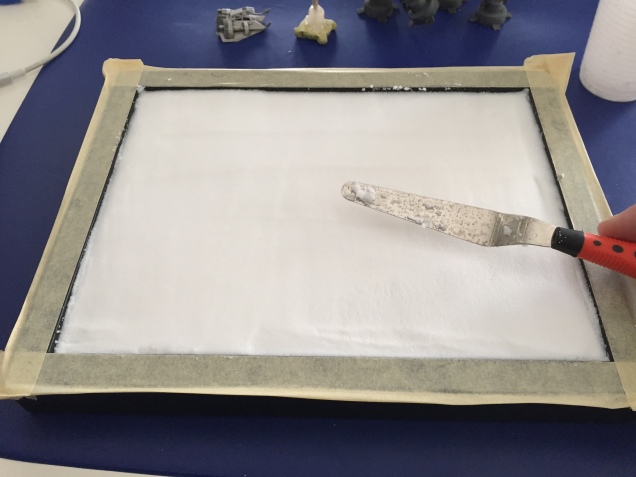
Now the snow part. As before, I fitted a k-line base with some holes in it, to ease the snow drying process. I’ve mixed the snow with the cement (2:1 proportion) and created a first base.
Frame with the k-line baseStarting to lay down the snow.Snow base layer
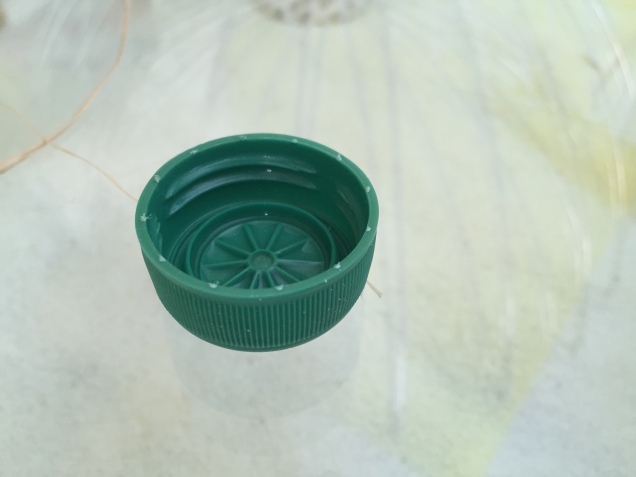
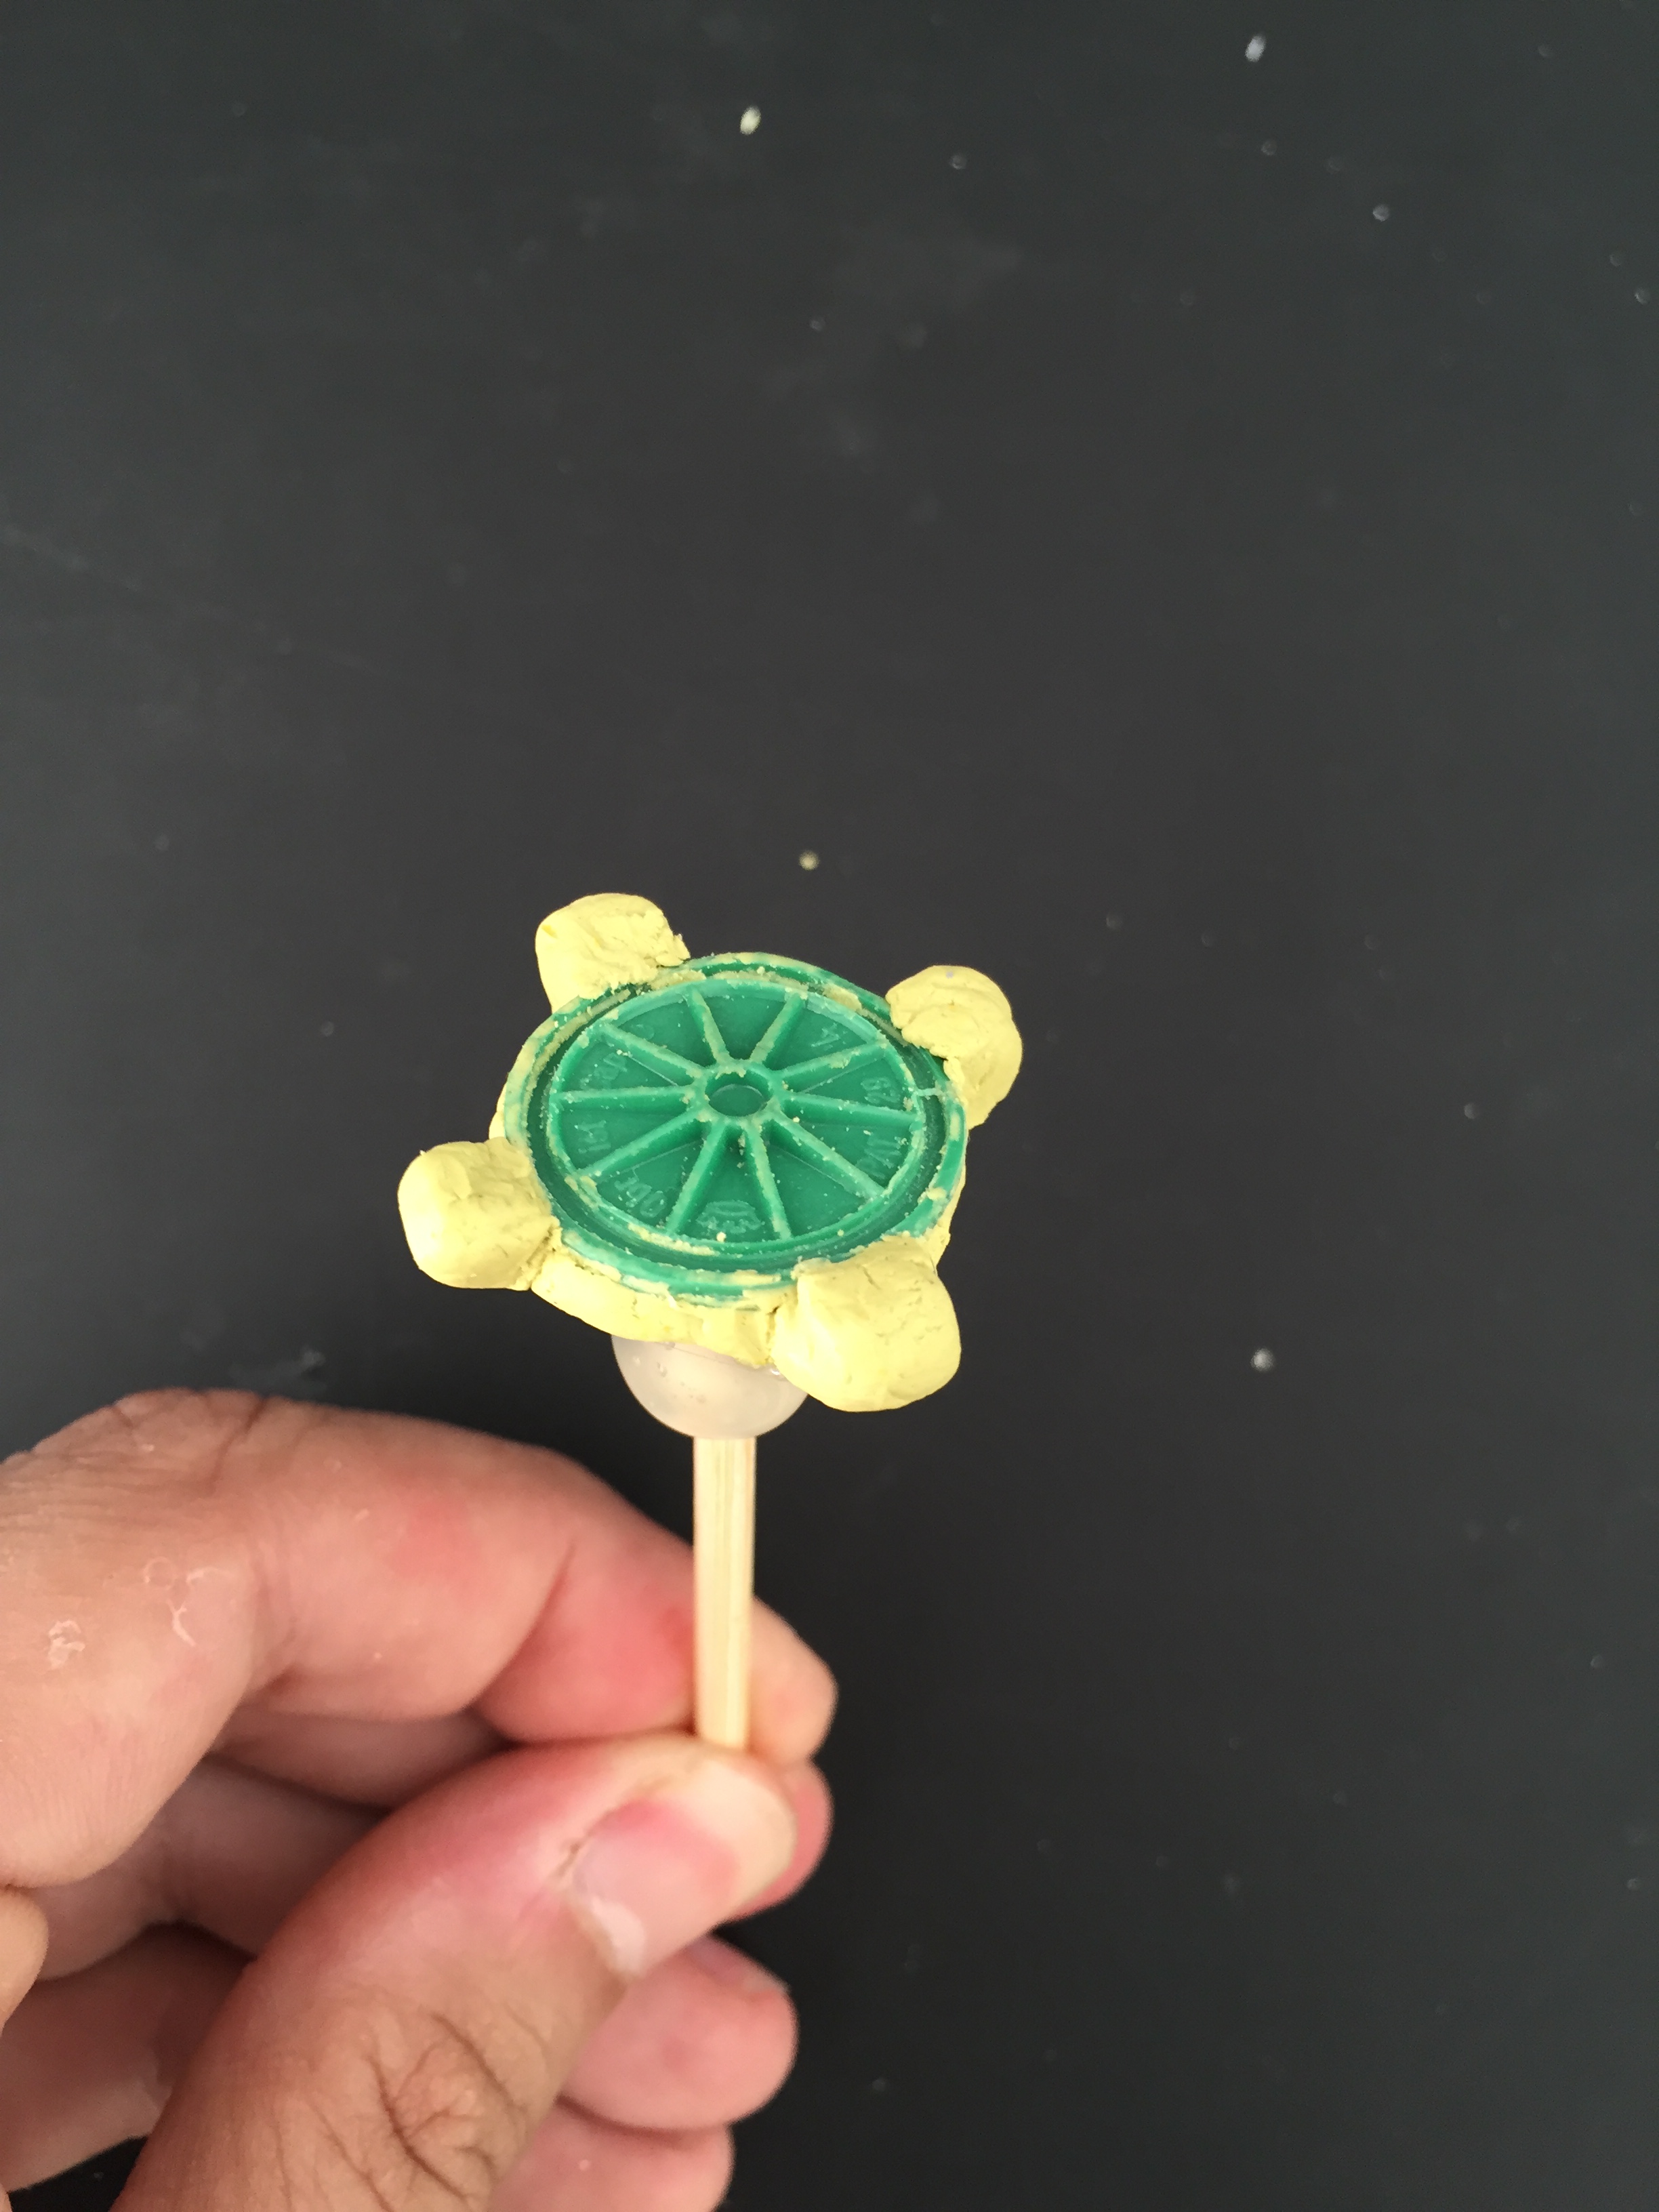
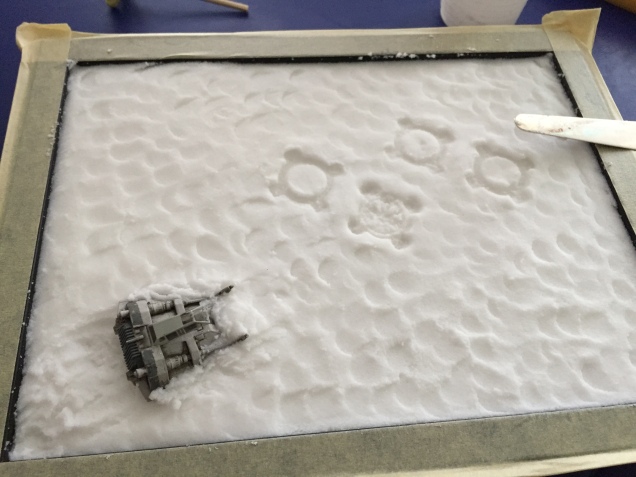
Then, I’ve placed the crashed speeder with some drag marks and added some texture to the snow. I’ve also created a stamp with a bottle cap and some miliput in order to add the raised foot footstep.
Bottle cap used for the footstepFinished footstep
After placing the AT-AT in its position and “stamped” the foot mark in the snow, it looked like this.
After texturing the snow and adding the footsteps.
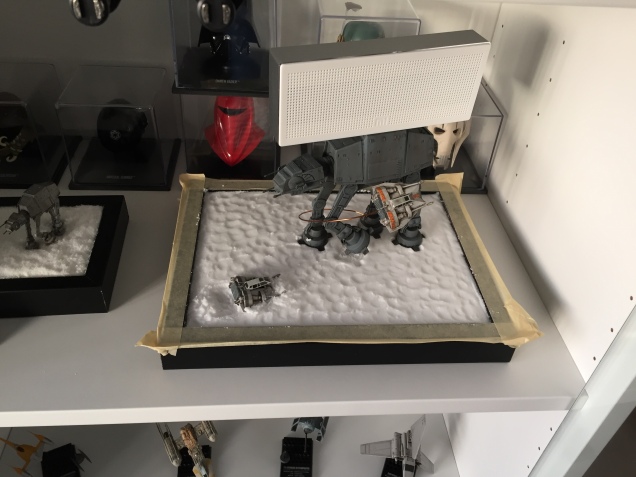
The drying process took some days, inside my custom-build IKEA BESTA Star Wars cabinet (maybe I’ll post this IKEA hack later). 🙂
Snow drying
This is the final look of it. Maybe I’ll add some pigments in the crashed speeder in the future, but for now it’s ok.
This first modeling post is about Star Wars, one of my long-time favorite geek stuff.
This is a slightly more thorough post than I’ve made in the RPF Forum (link below).
Basically I wanted to recreate one of my favorite scenes of the older trilogy, the Hoth iced planet AT-AT vs Snowspeeder scene. This is by no means an original idea, in fact I’ve followed Dr. Fausts and Toxicrafa’s videos on youtube. (I’m a firm believer of giving credit to the ones who deserve it, so you can find the links below:)
I’m a complete newbie to both airbrushing and weathering techniques. After a lot of searching I’ve bought myself an Iwata Eclipse HP-CS with a cheap multi-purpose compressor which makes a lot of noise but works very good. Maybe I’ll do an airbrush post in the future, with a description of how I’ve built my own cheap paint booth from a plastic box.
Regarding the diorama… at first I’ve ordered the F-Toys models from eBay. As far as I could understand, F-Toys is a japanese maker which developed small and cheap Star-Wars vehicles plastic kits, which are not easily available in Europe. So, eBay was the way to go. First I’ve ordered the AT-AT and the Snowspeeders, but messed up: instead of ordering the big AT-AT I’ve ordered the two smaller ones by mistake.
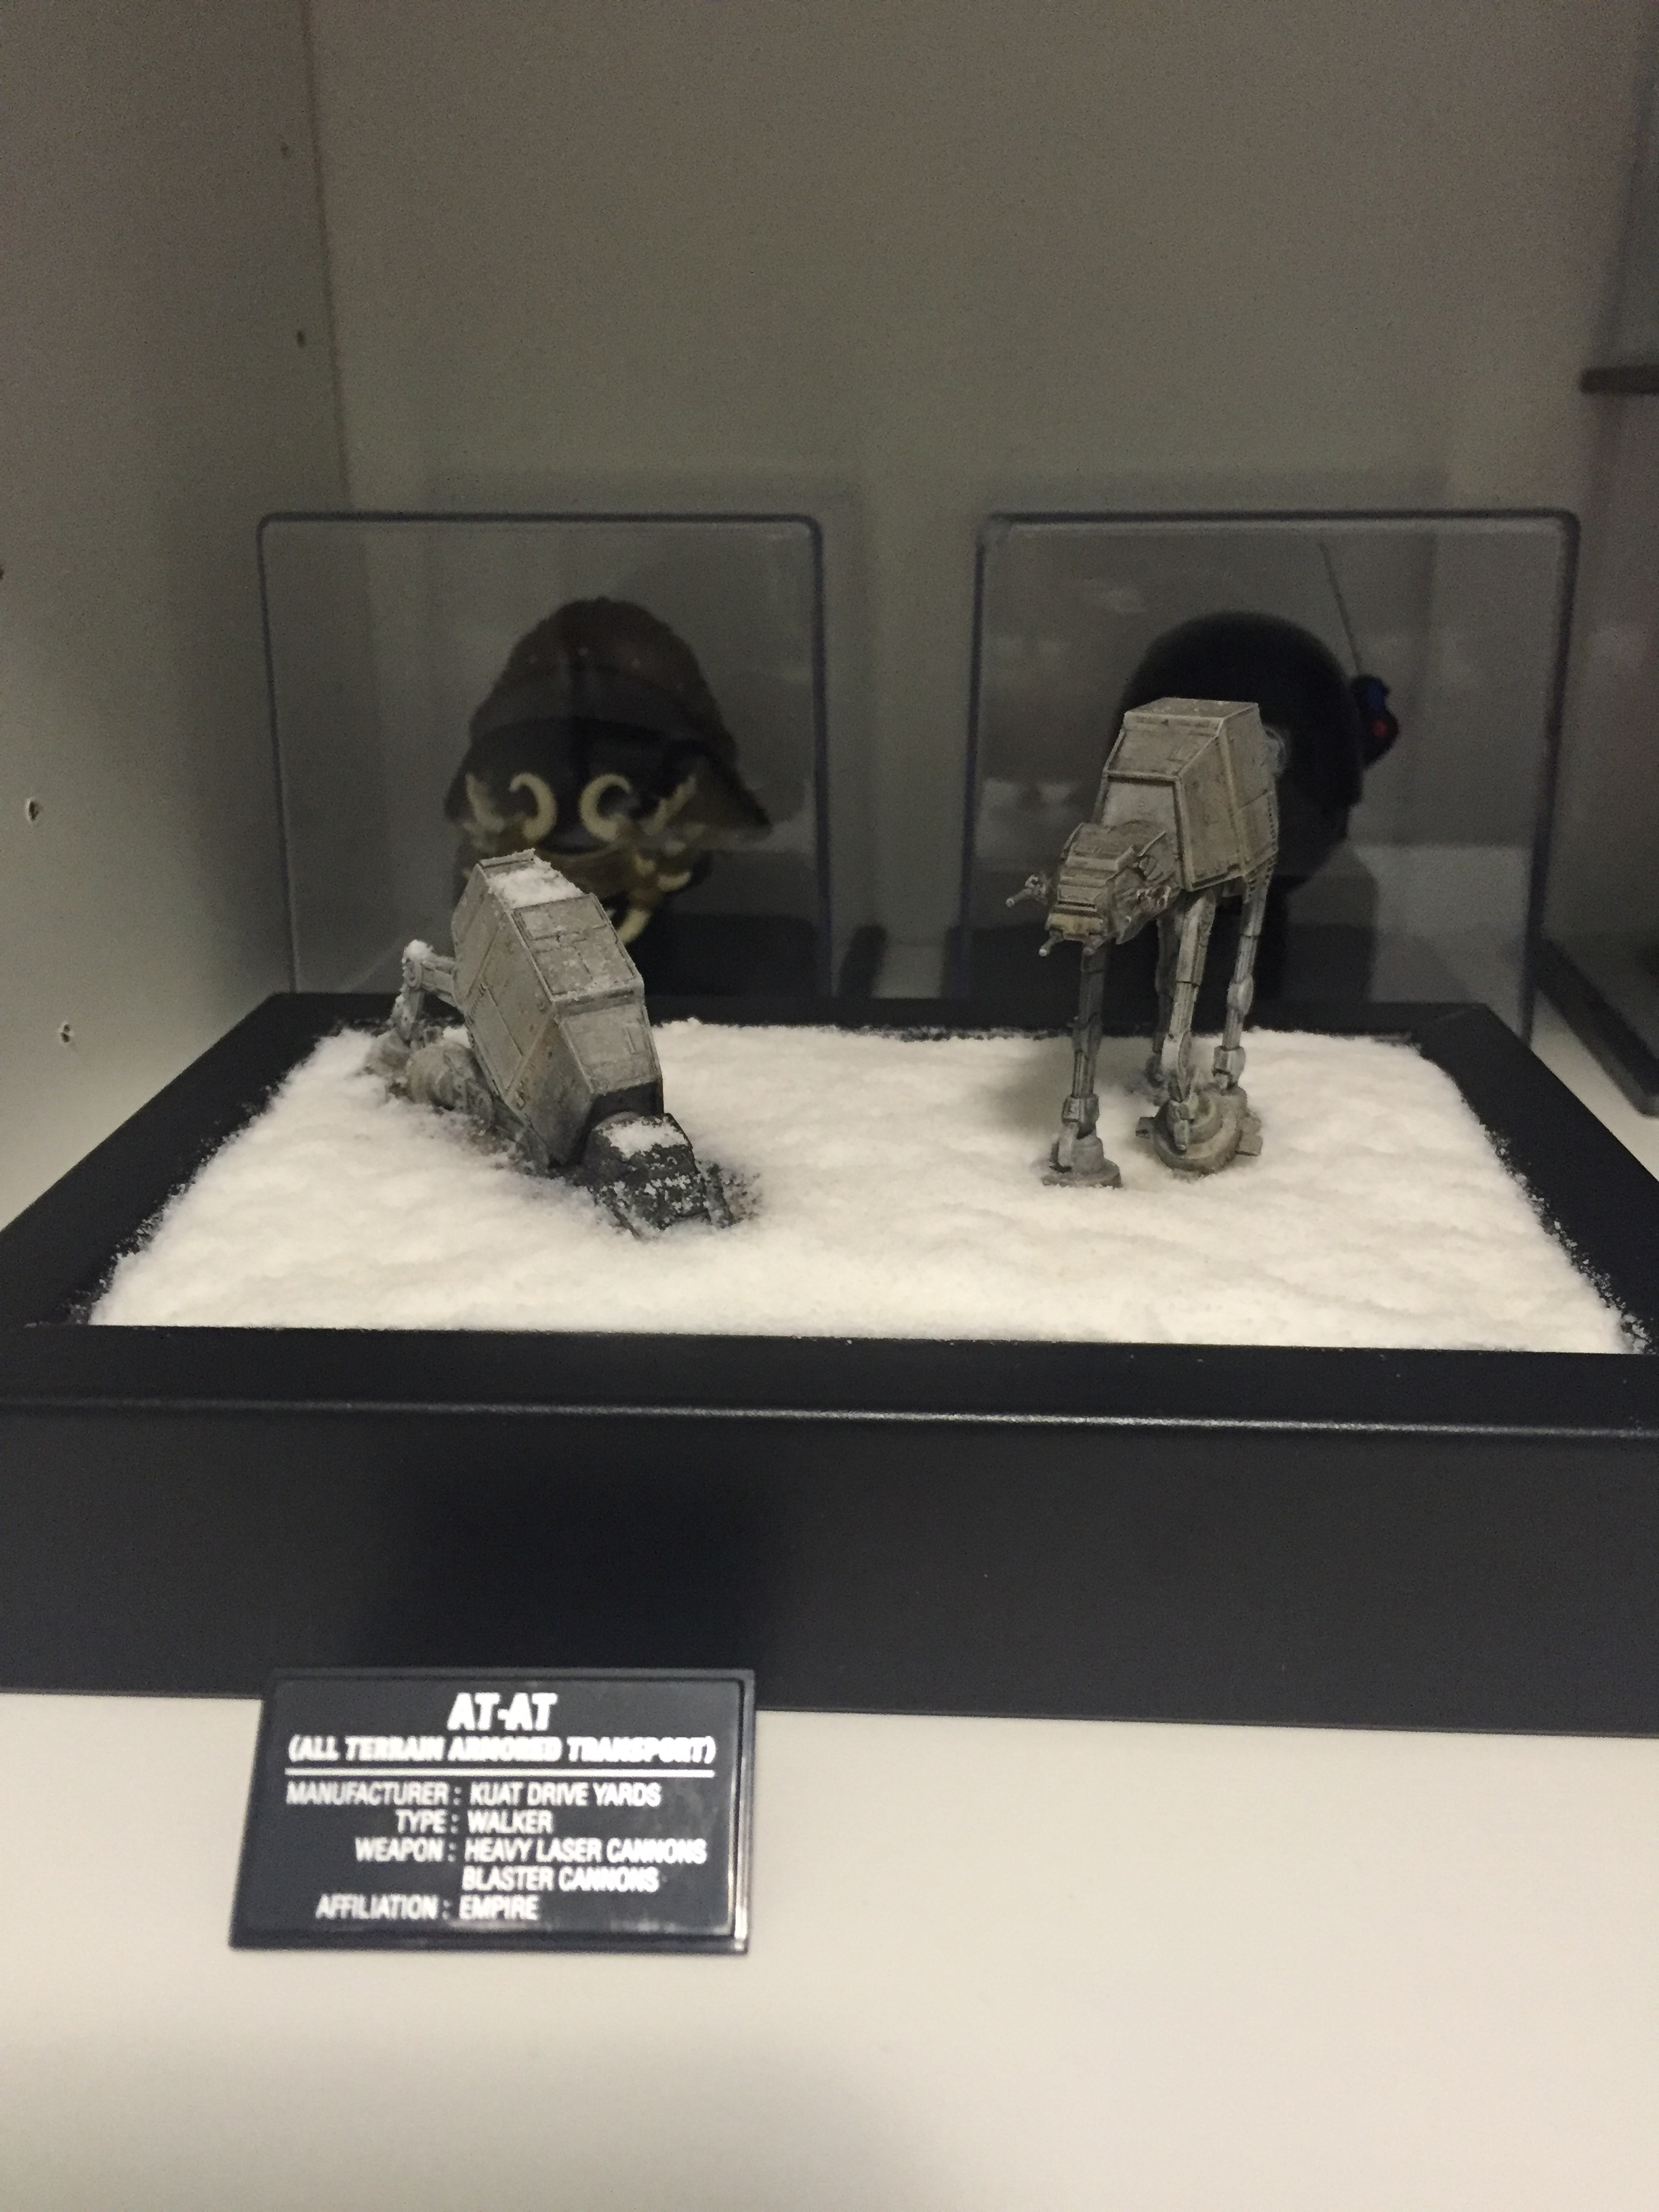
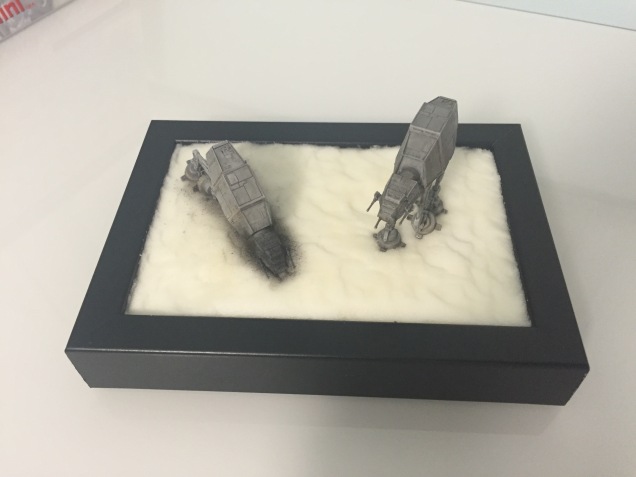
Since I did not had any experience with the artificial snow and with pigments, I’ve thought on making a smaller version of the diorama with the two AT-ATs, one walking and another one destroyed. For that I’ve sanded the head mount of one AT-AT and glued the legs in order to get the “face plant” position.
AT-AT Walking PositionCrashed AT-AT
I kept the original paint, but weathered them with Mig Productions 502 Abteilung oils and finish with some dark “Rocket Exhaust” pigment.
The support is a small cheap frame, such as in the inspiration videos, and in order to get the snow effect I’ve bought Woodland Scenics Soft Flake Snow and mixed it with standard PVA glue.
Snow drying
It turned out quite ok, the only thing is that the white glue turned the snow a little yellow after drying.