After finishing the “test” diorama, I though I was OK for going towards the main goal.
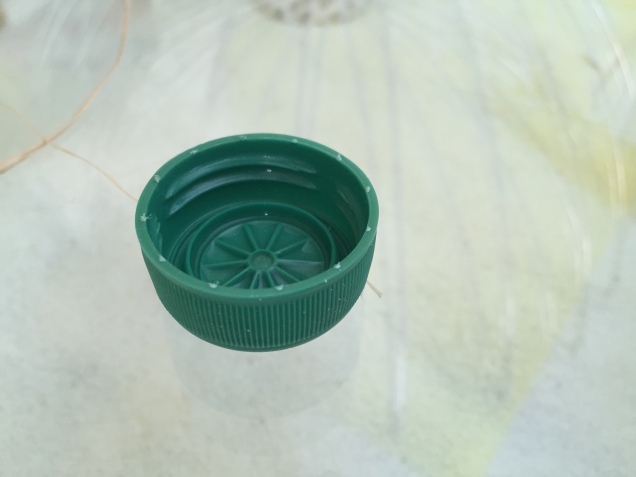
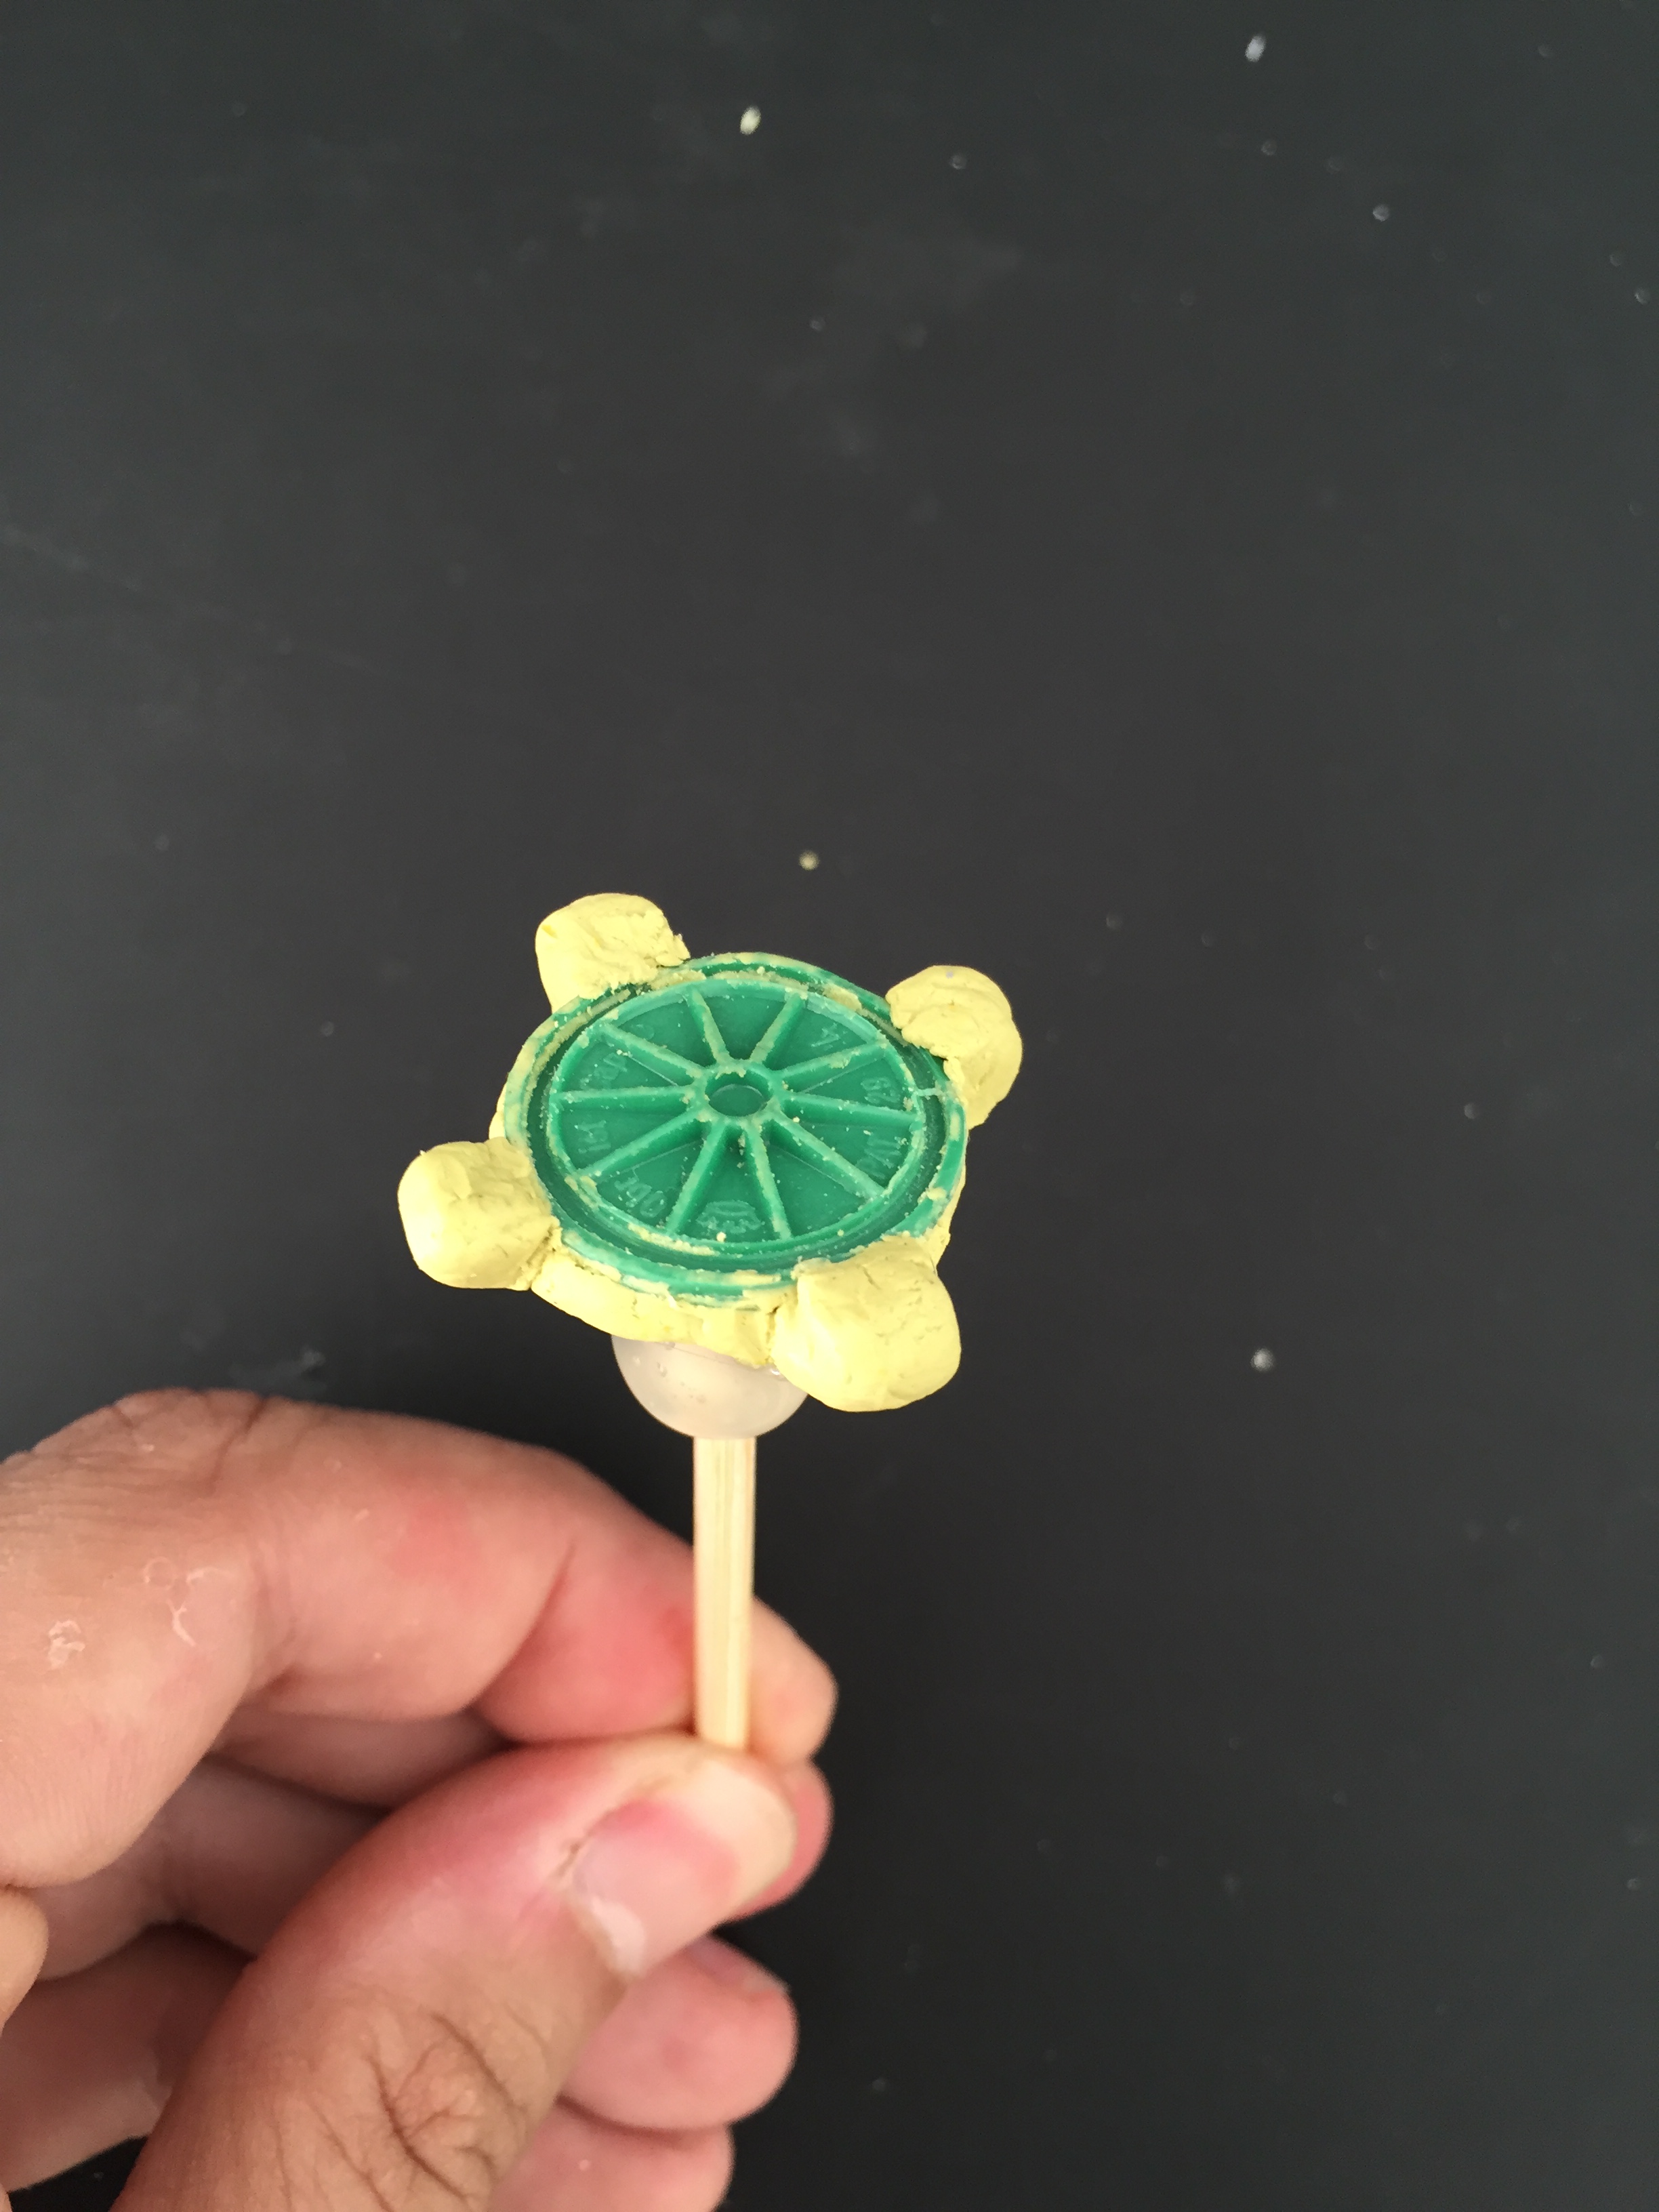
The first step was shaping the big AT-AT, such as turning the head slightly to the side and filling the base of the raised food with the bottom part of a bottle cap. Regarding the snowspeeders, the idea was to improve the original diorama design by placing one flying around the AT-AT with the cable and another one crashed on the snow. For the one which was flying I’ve added a pilot made of miliput and the one crashed had the canopy modded so it can be left open. I’ve also made a miliput leg print, so I can leave some AT-AT steps on the snow. In the photos is also visible one F-toys Tydirium, which I also primed and painted together with the rest of the ships.

The process for painting all the ships was the same:
- airbrush primer with Vallejo white primer
- airbrush with Tamiya paints (dilluted 1:2 with Tamiya thinner)
- airbrushing with Vallejo gloss finish
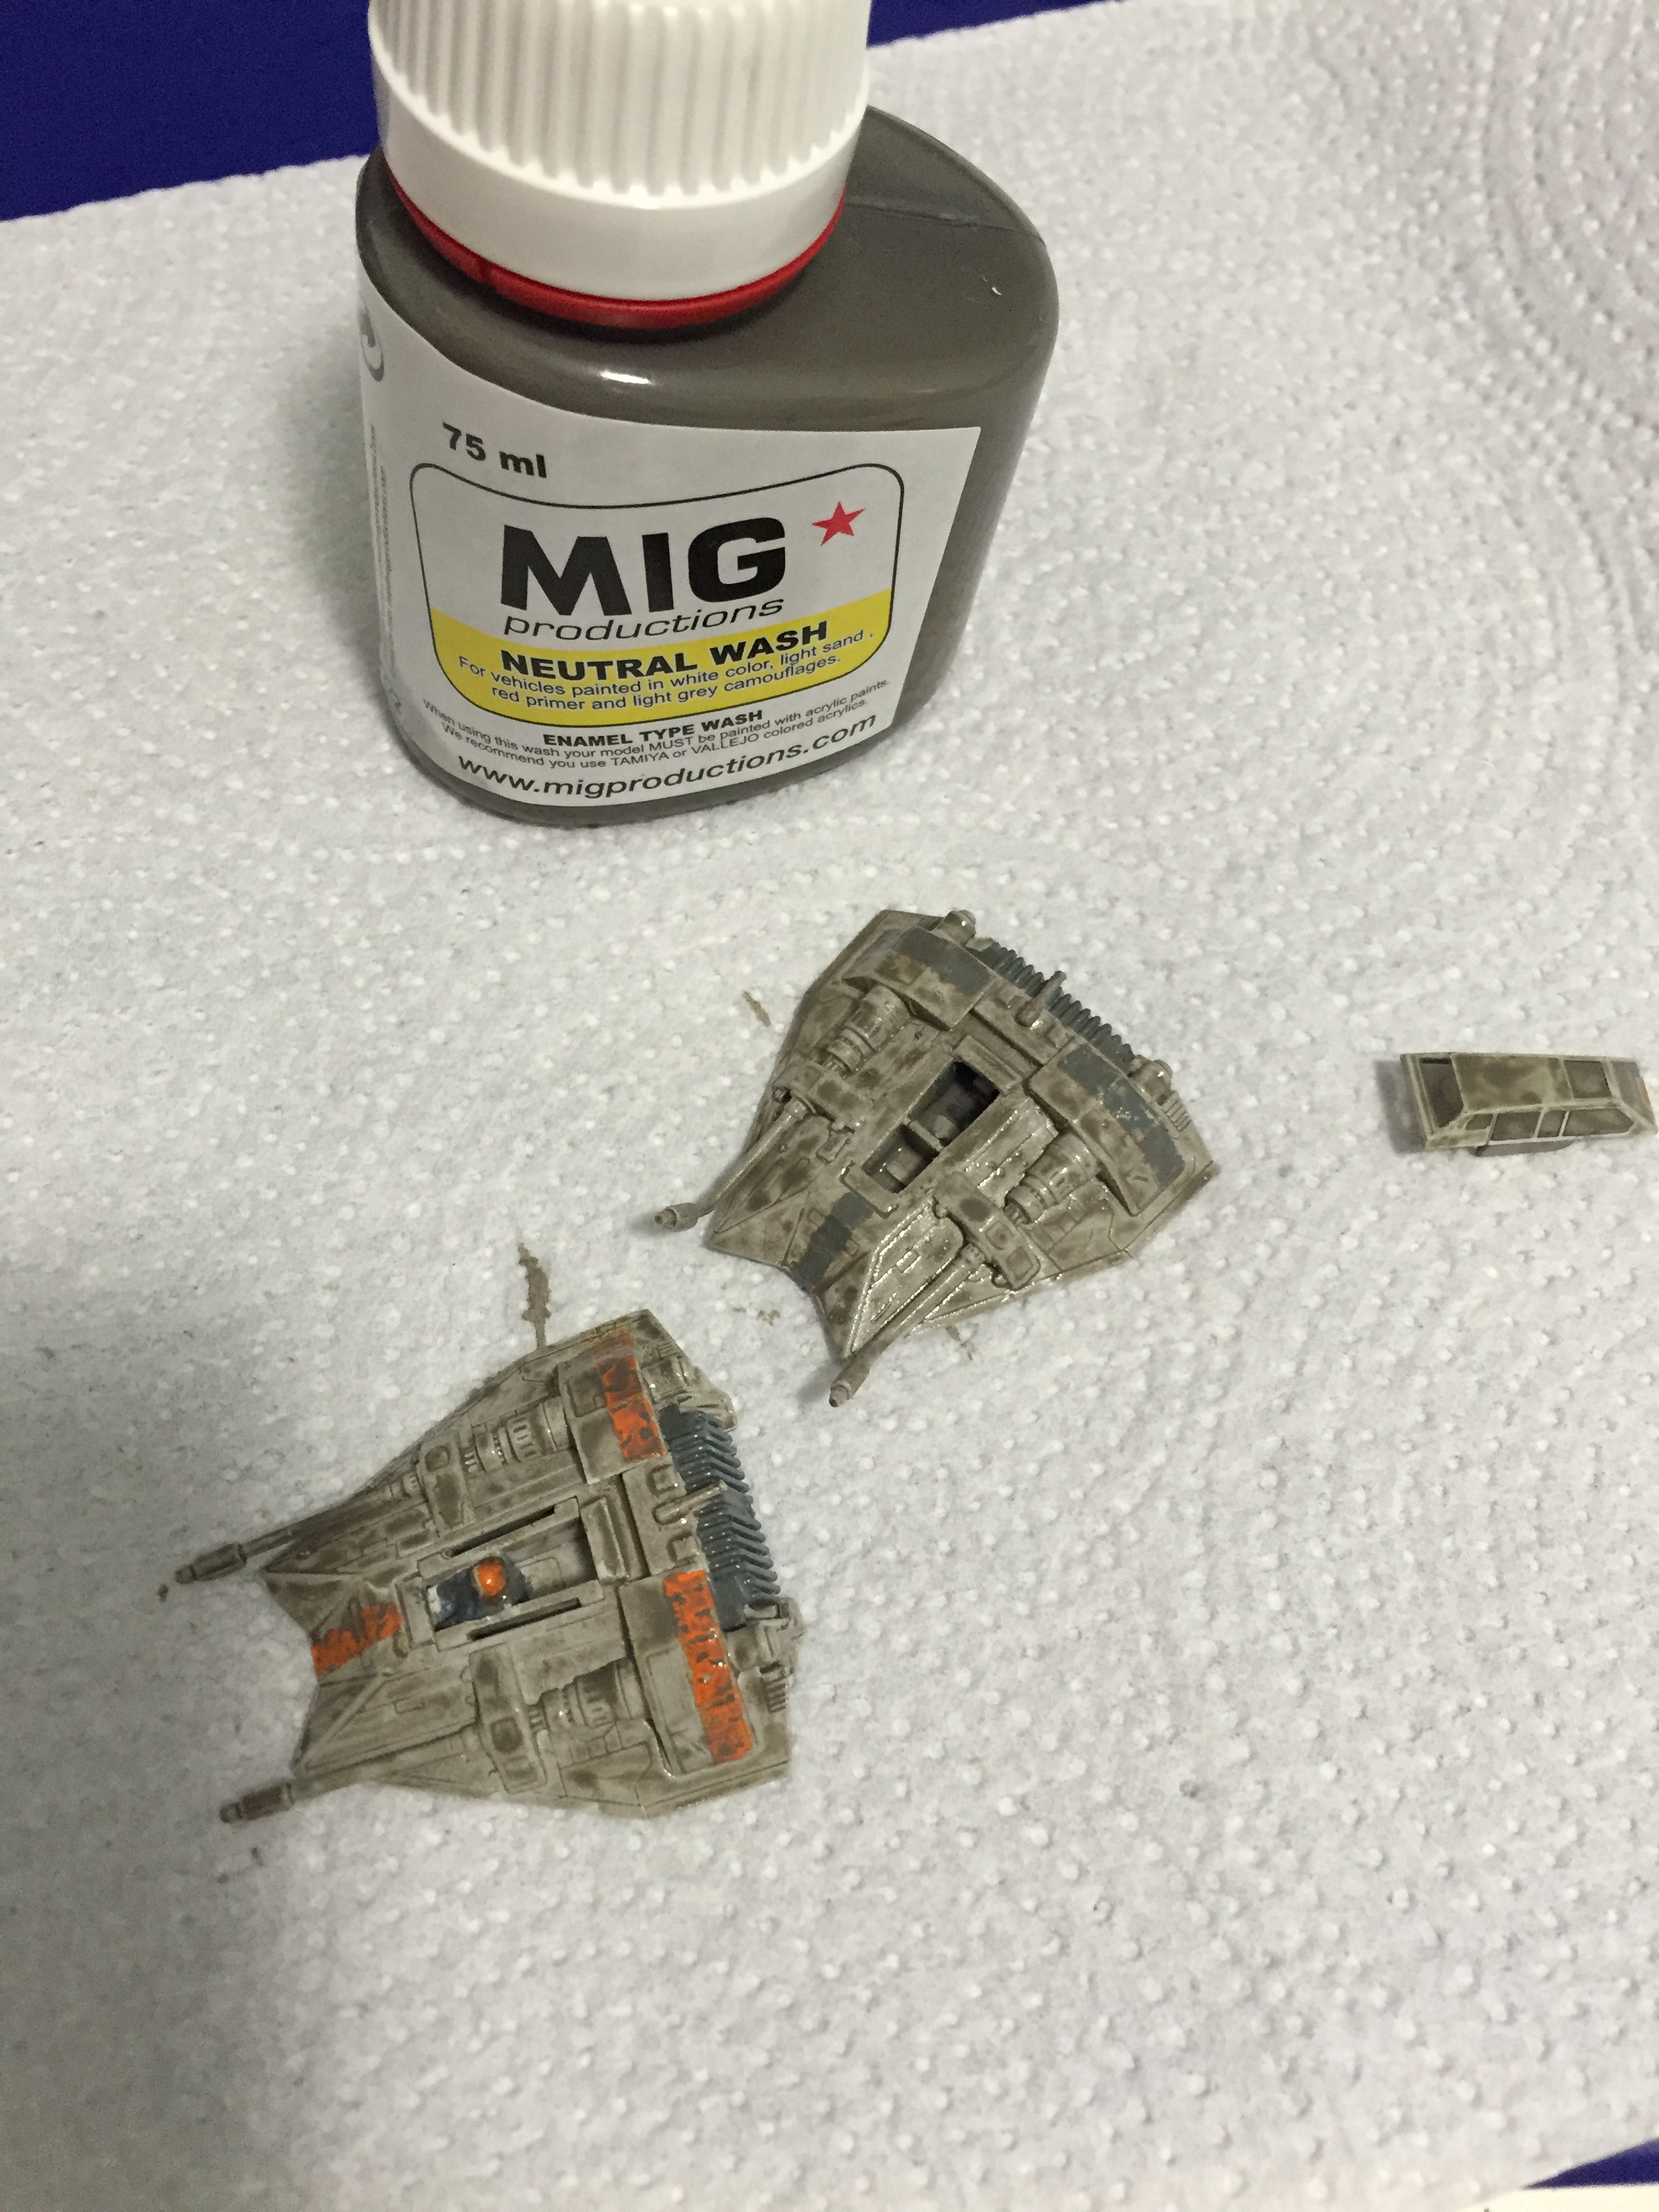
- add MIG washes (Neutral wash for the Tydirium and Snowspeeders, Dark and Brown for the AT-AT)
- airbrush with Vallejo mate finish
For the colors, I’ve did some research, mostly in RPF forum. I did wanted to use Tamiya colors since they’re easier to find:
- AT-AT: XF-66
- Tydirium: mix of XF-19 and white (XF-2)
- Snowspeeder: mix of XF-19 and white (XF-2), but with a “lighter” mix
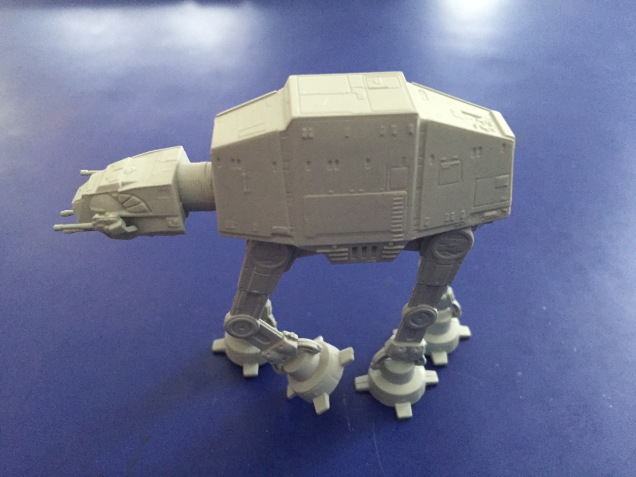
This is AT-AT after all the paint, weathering and finishing steps.

Regarding the speeders, first step was to carve some scratches before the primer, and after applying the base paint coat I’ve hand painted the dark grey and orange stripes.
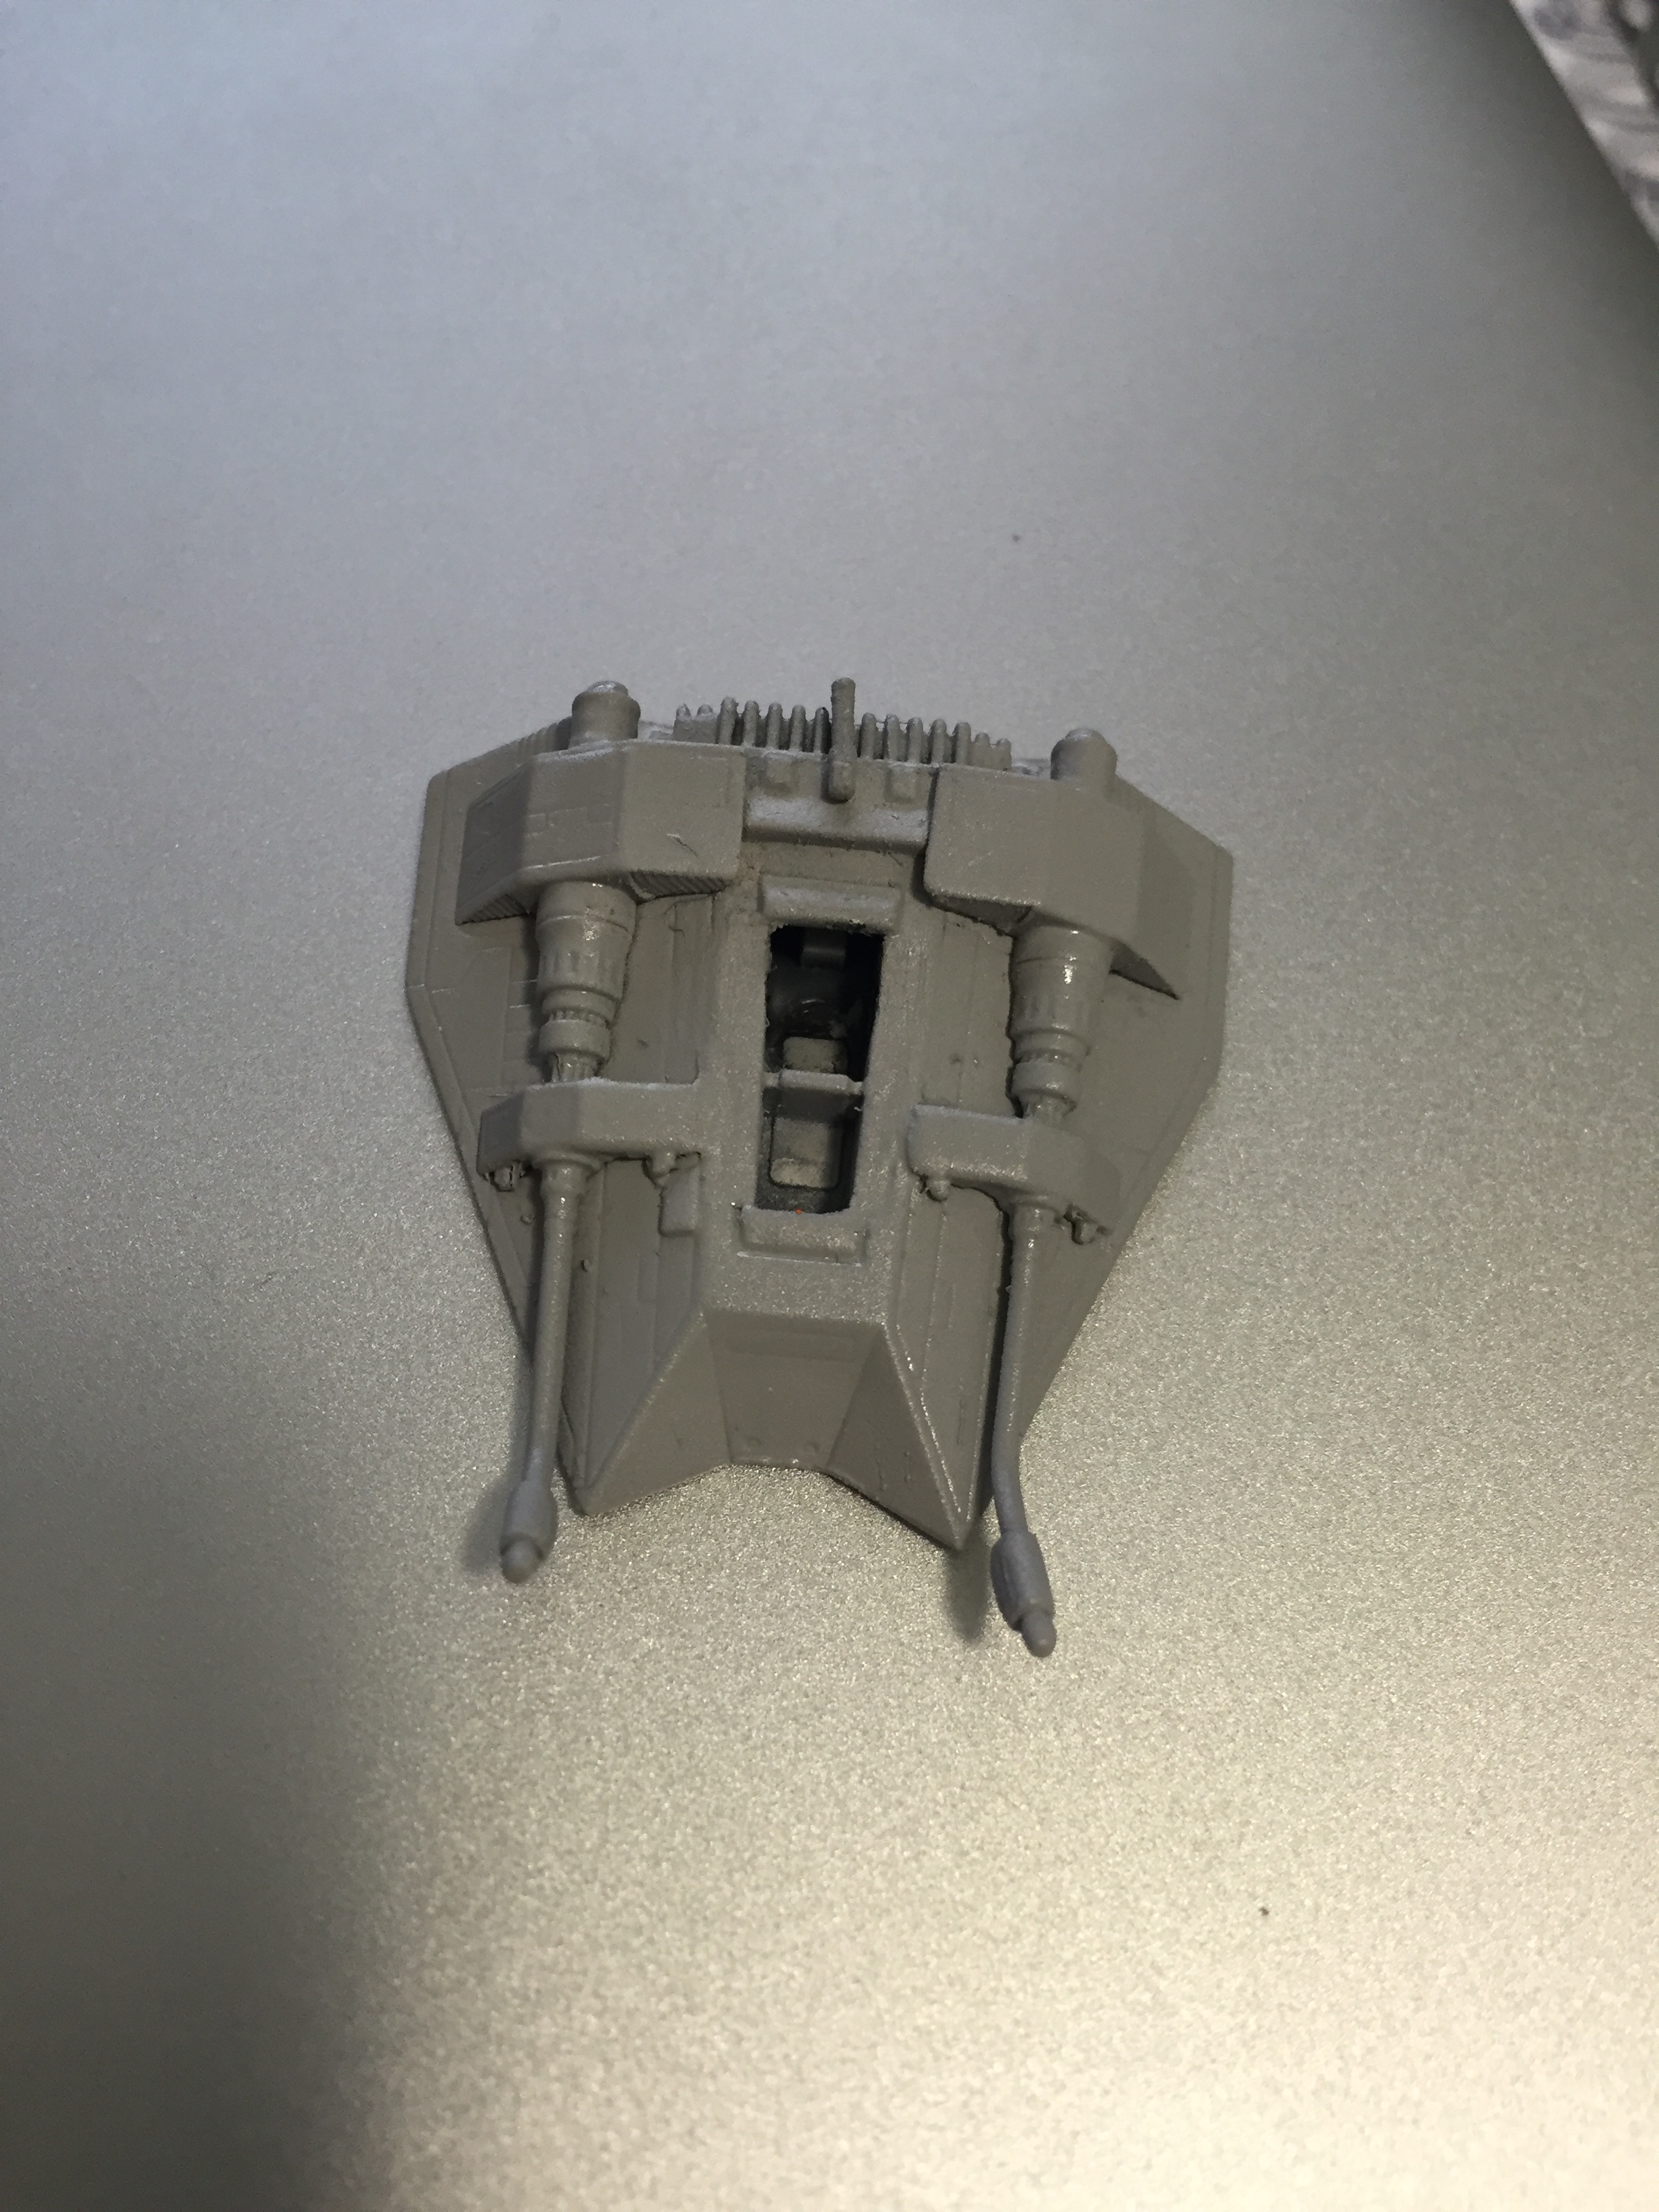
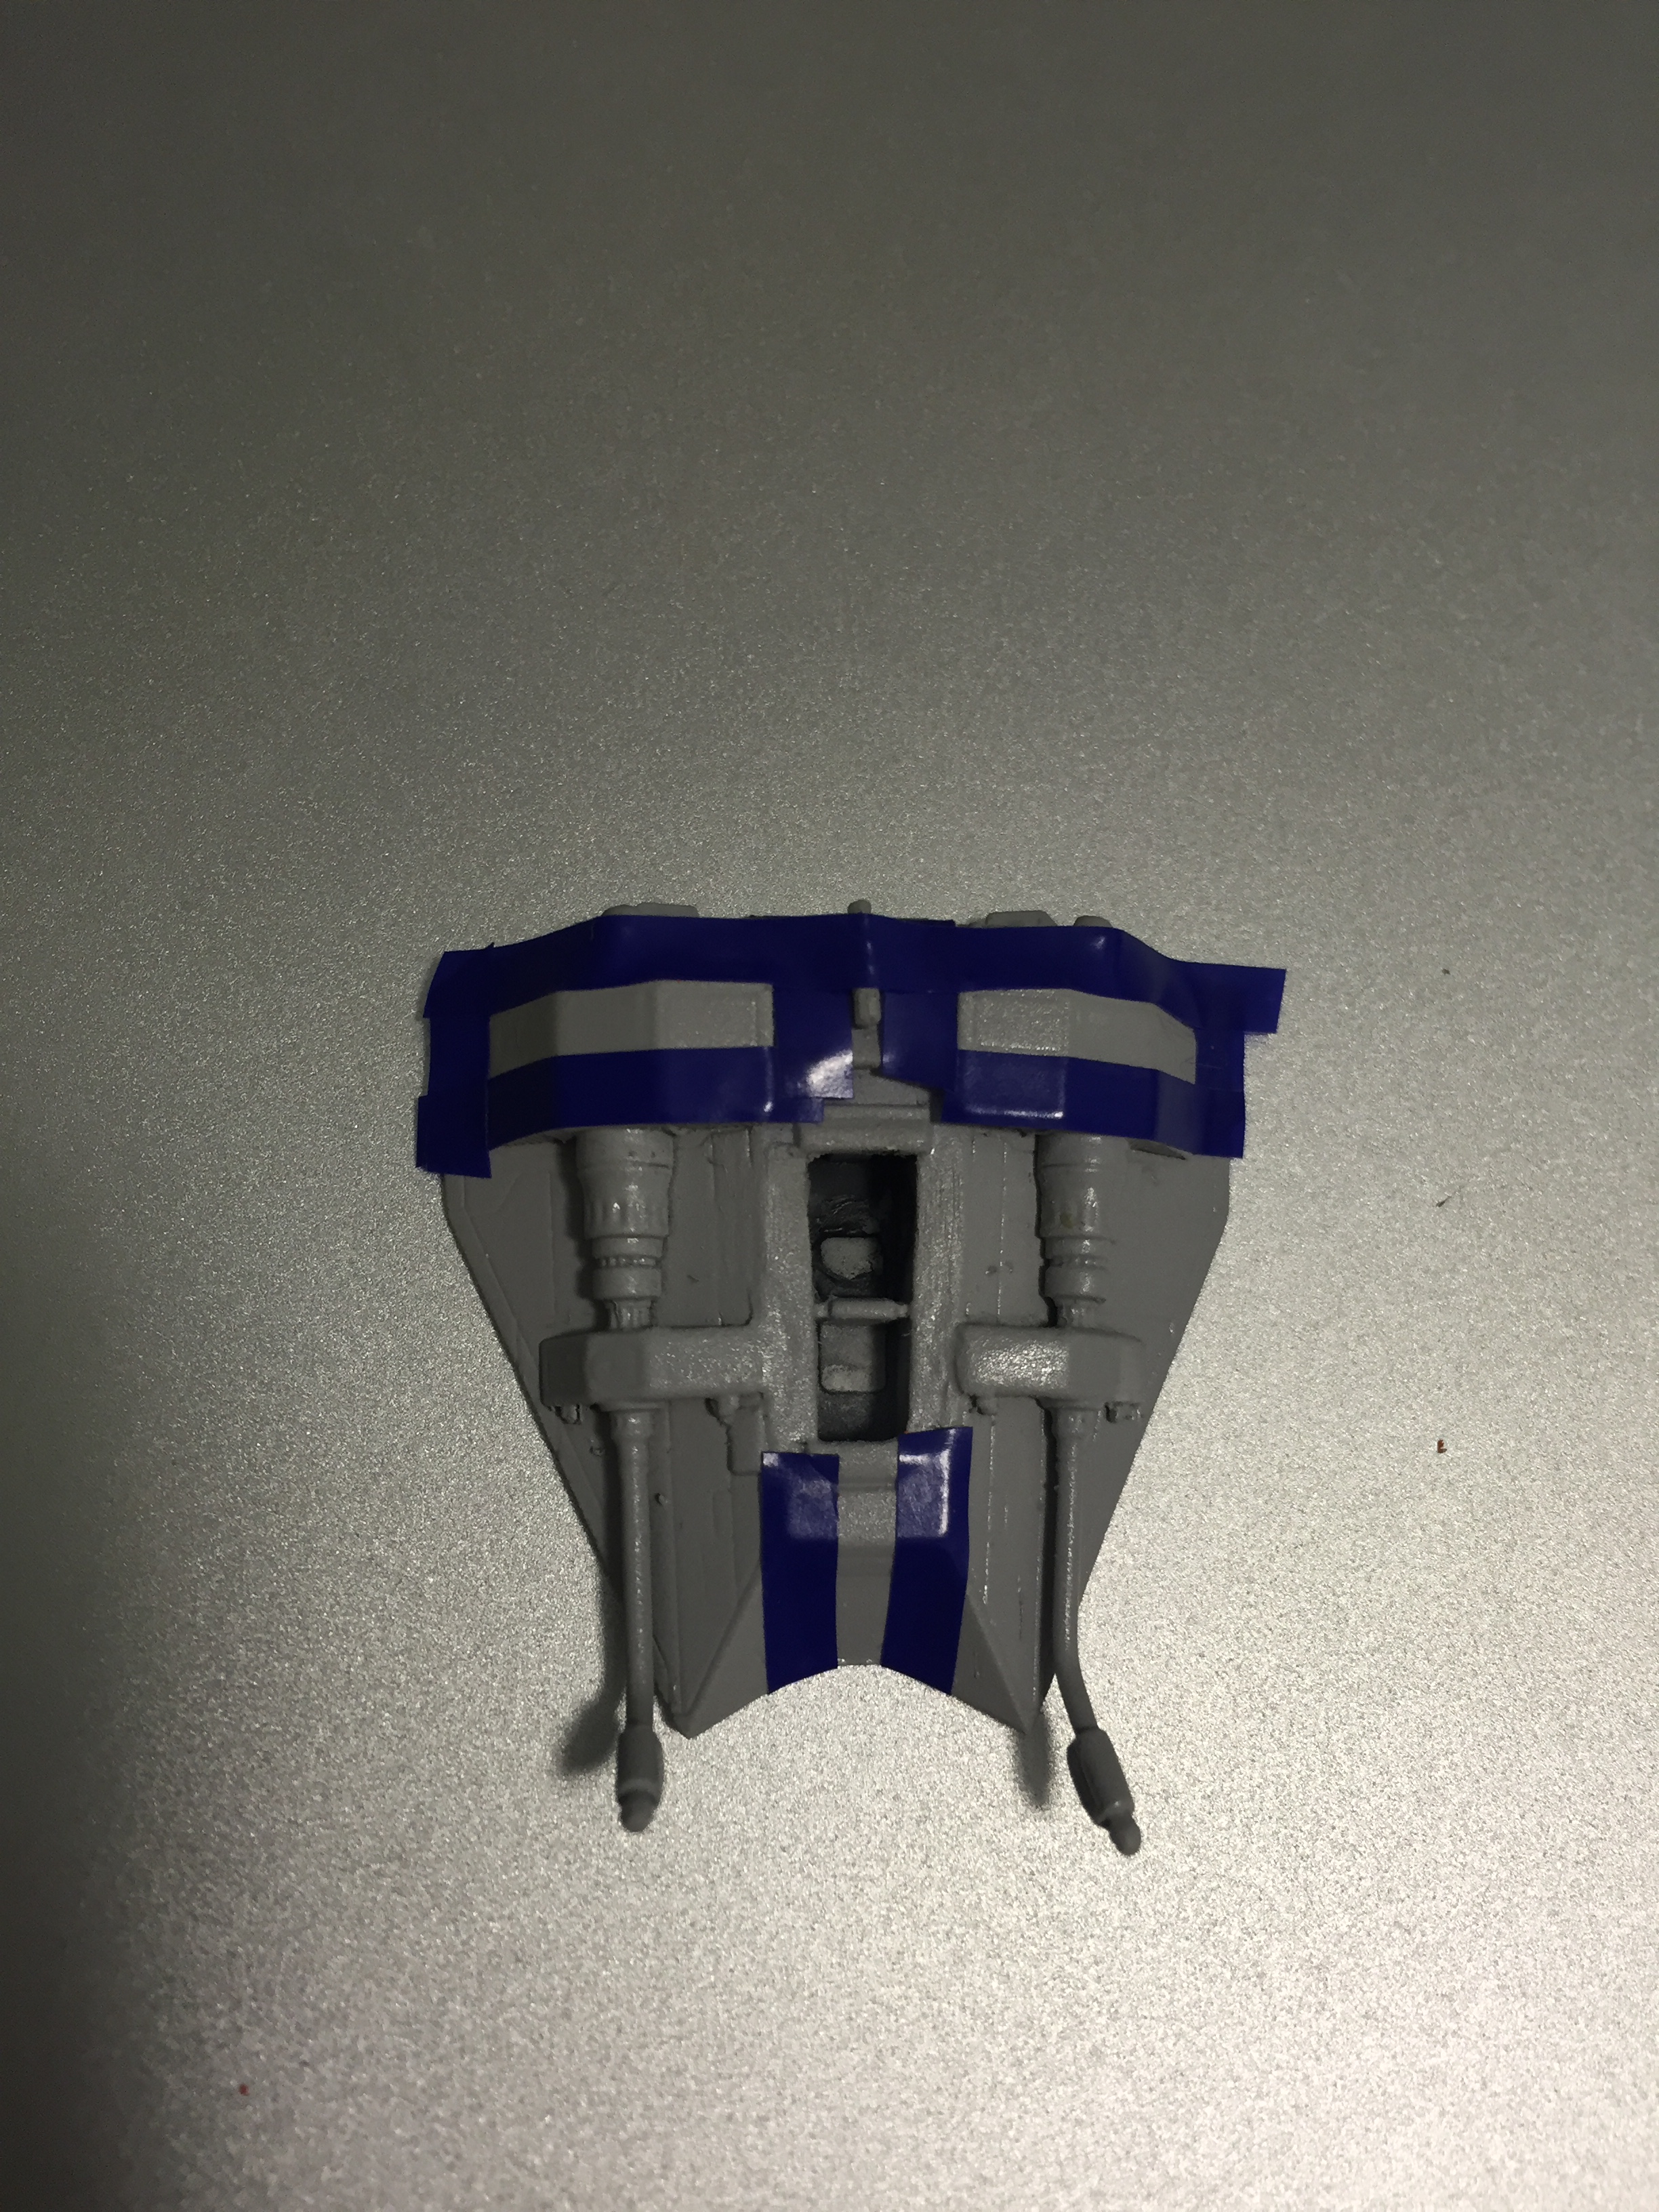

The next step was to add the chipping effect to the stripes, in order to give it a more weathered look and add some texture for the washes to grab into.
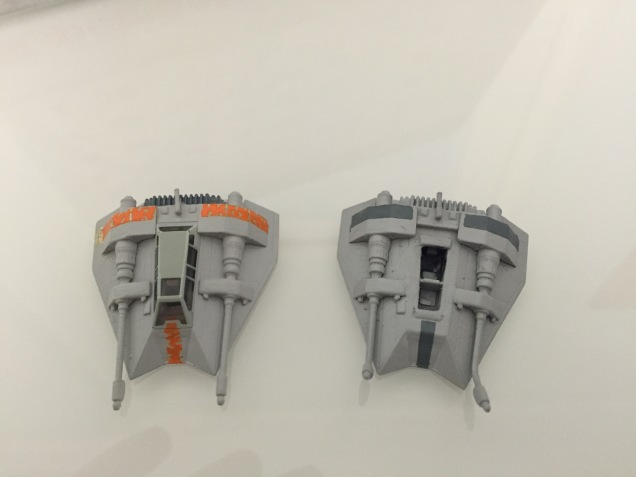
The last steps was to add the MIG Neutral wash and seal with the matt varnish.
Regarding the first small diorama, I’ve made some changes. Since the original glue turned the snow a bit yellow, I decided on buying some appropriate materials for the new diorama, namely a bottle ~1/2 L of Woodland Scenics Scenic Cement. With a brush I’ve layed some of this cement on the top of the yellowed snow and poured some flakes on the top. I think it solved the issue, and gave the snow a more realistic and textured look. I think this is finally finished apart for some pigment work.
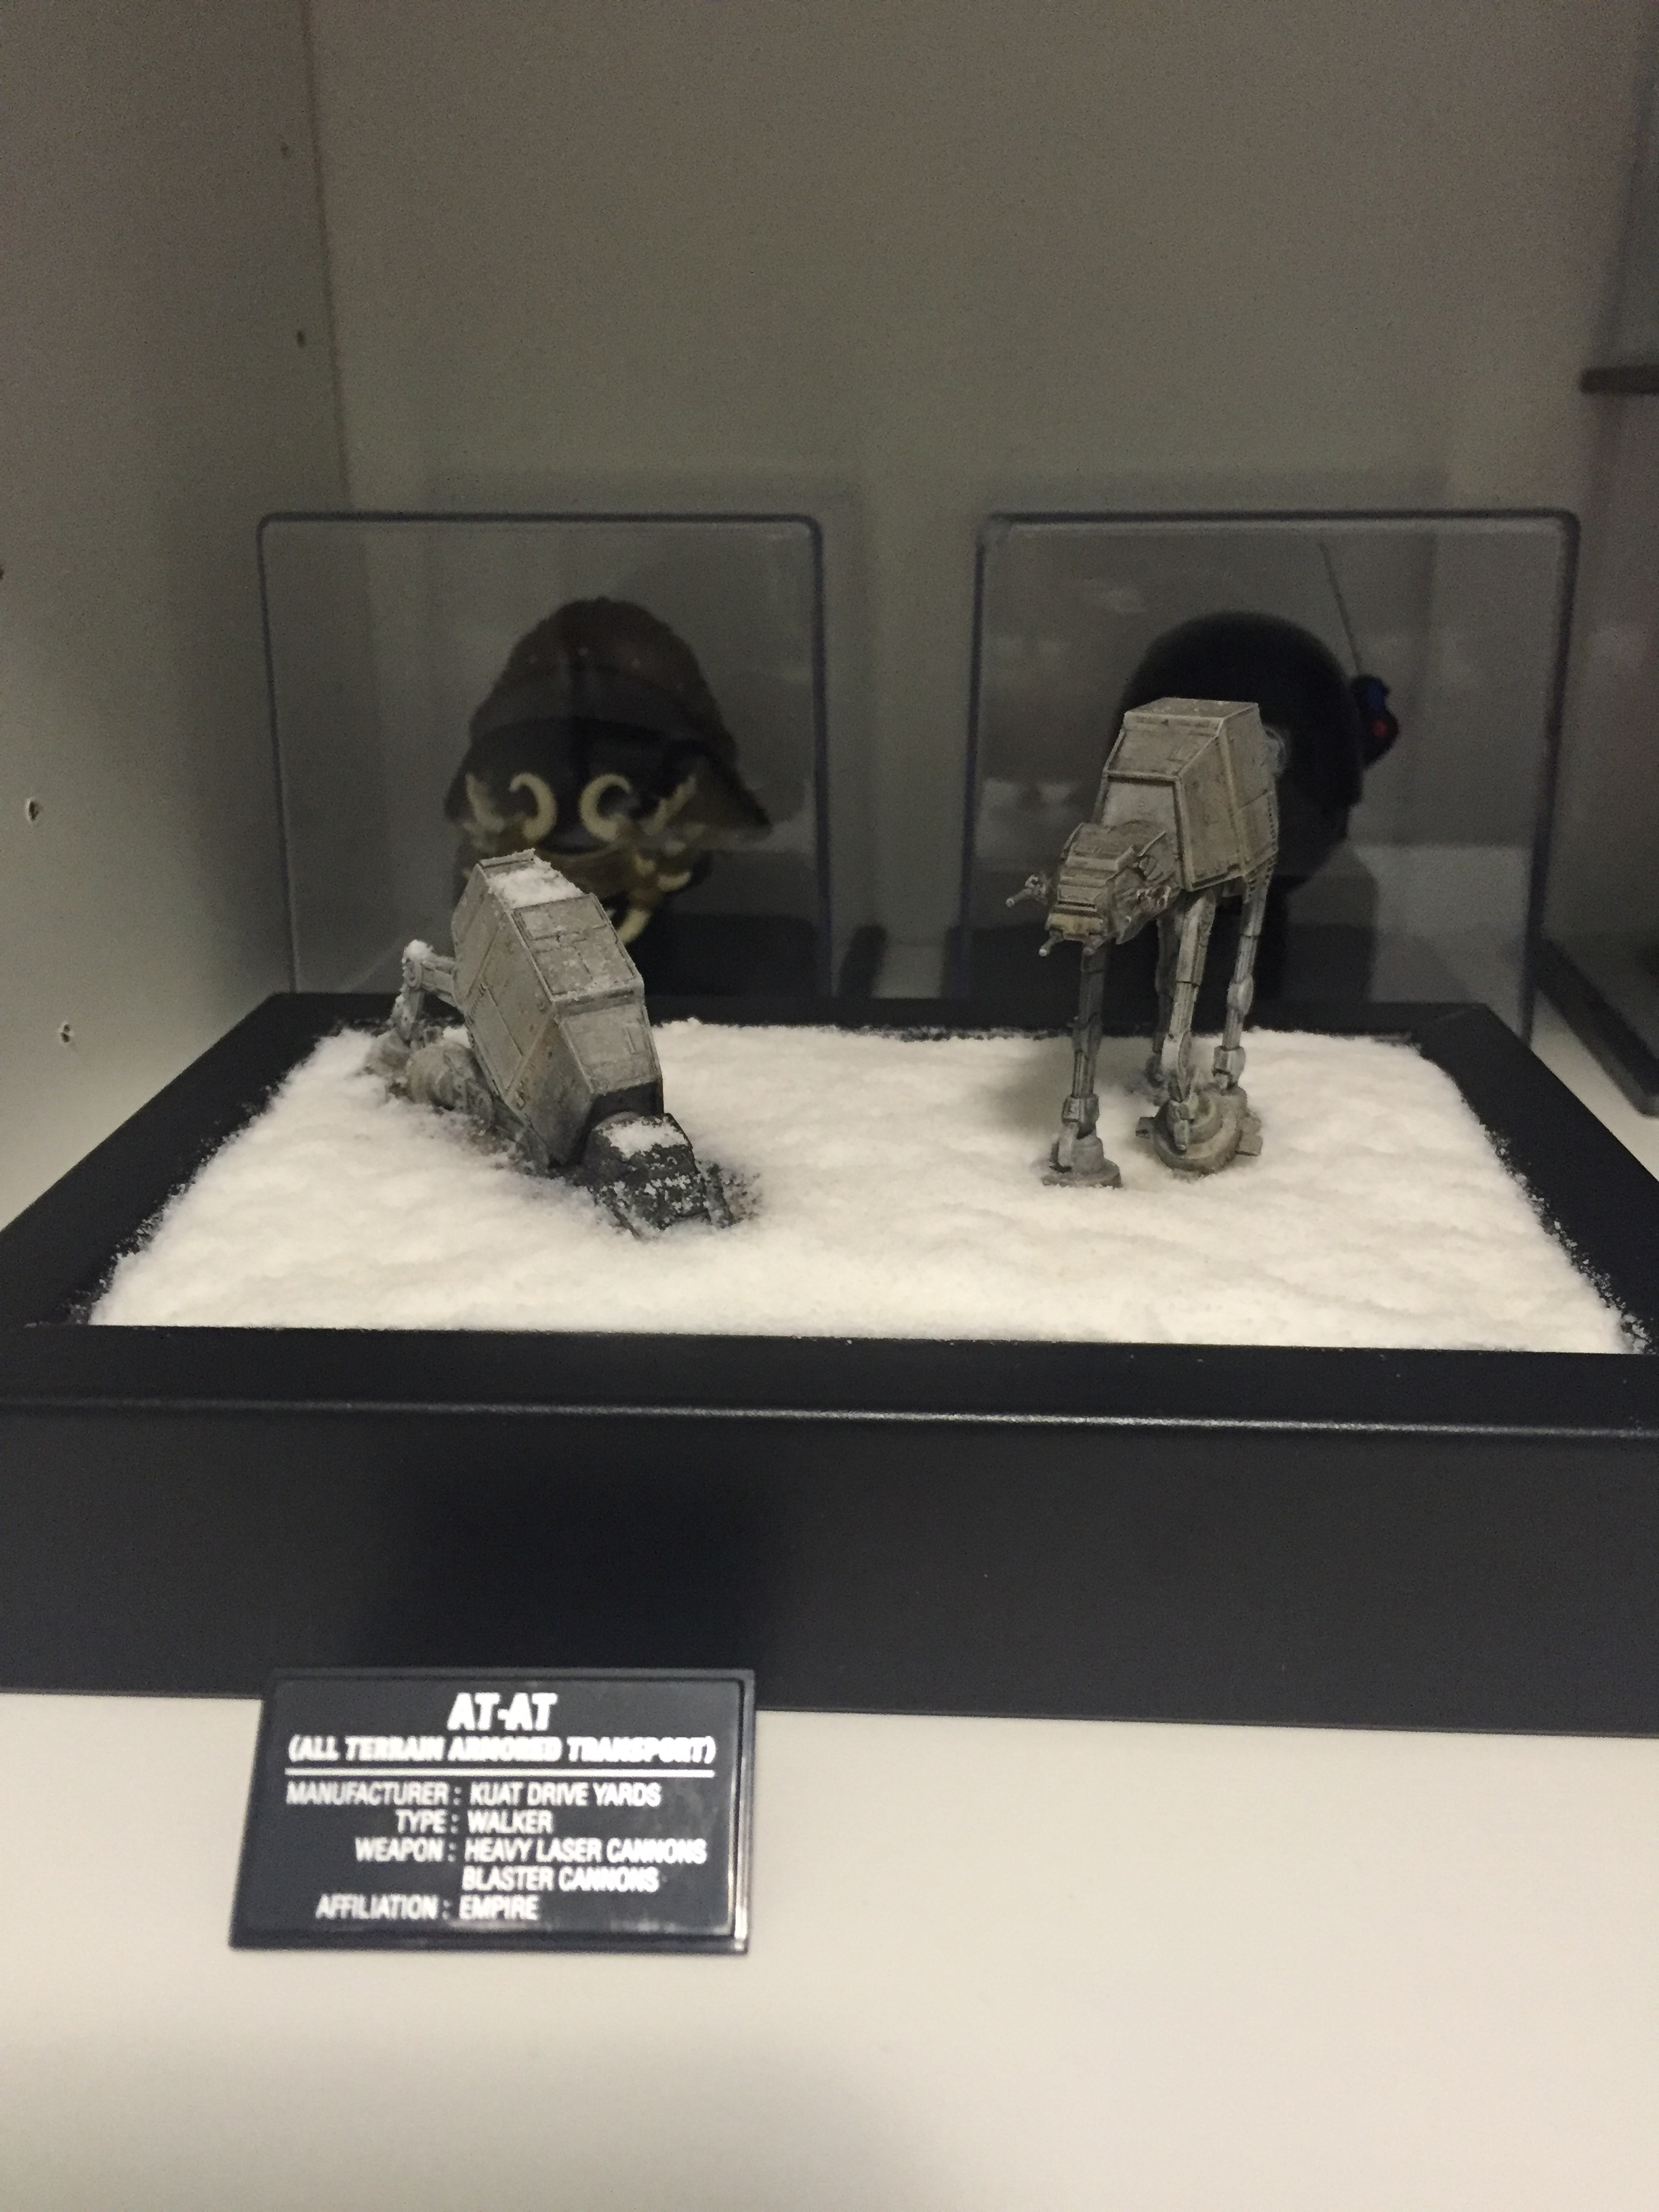
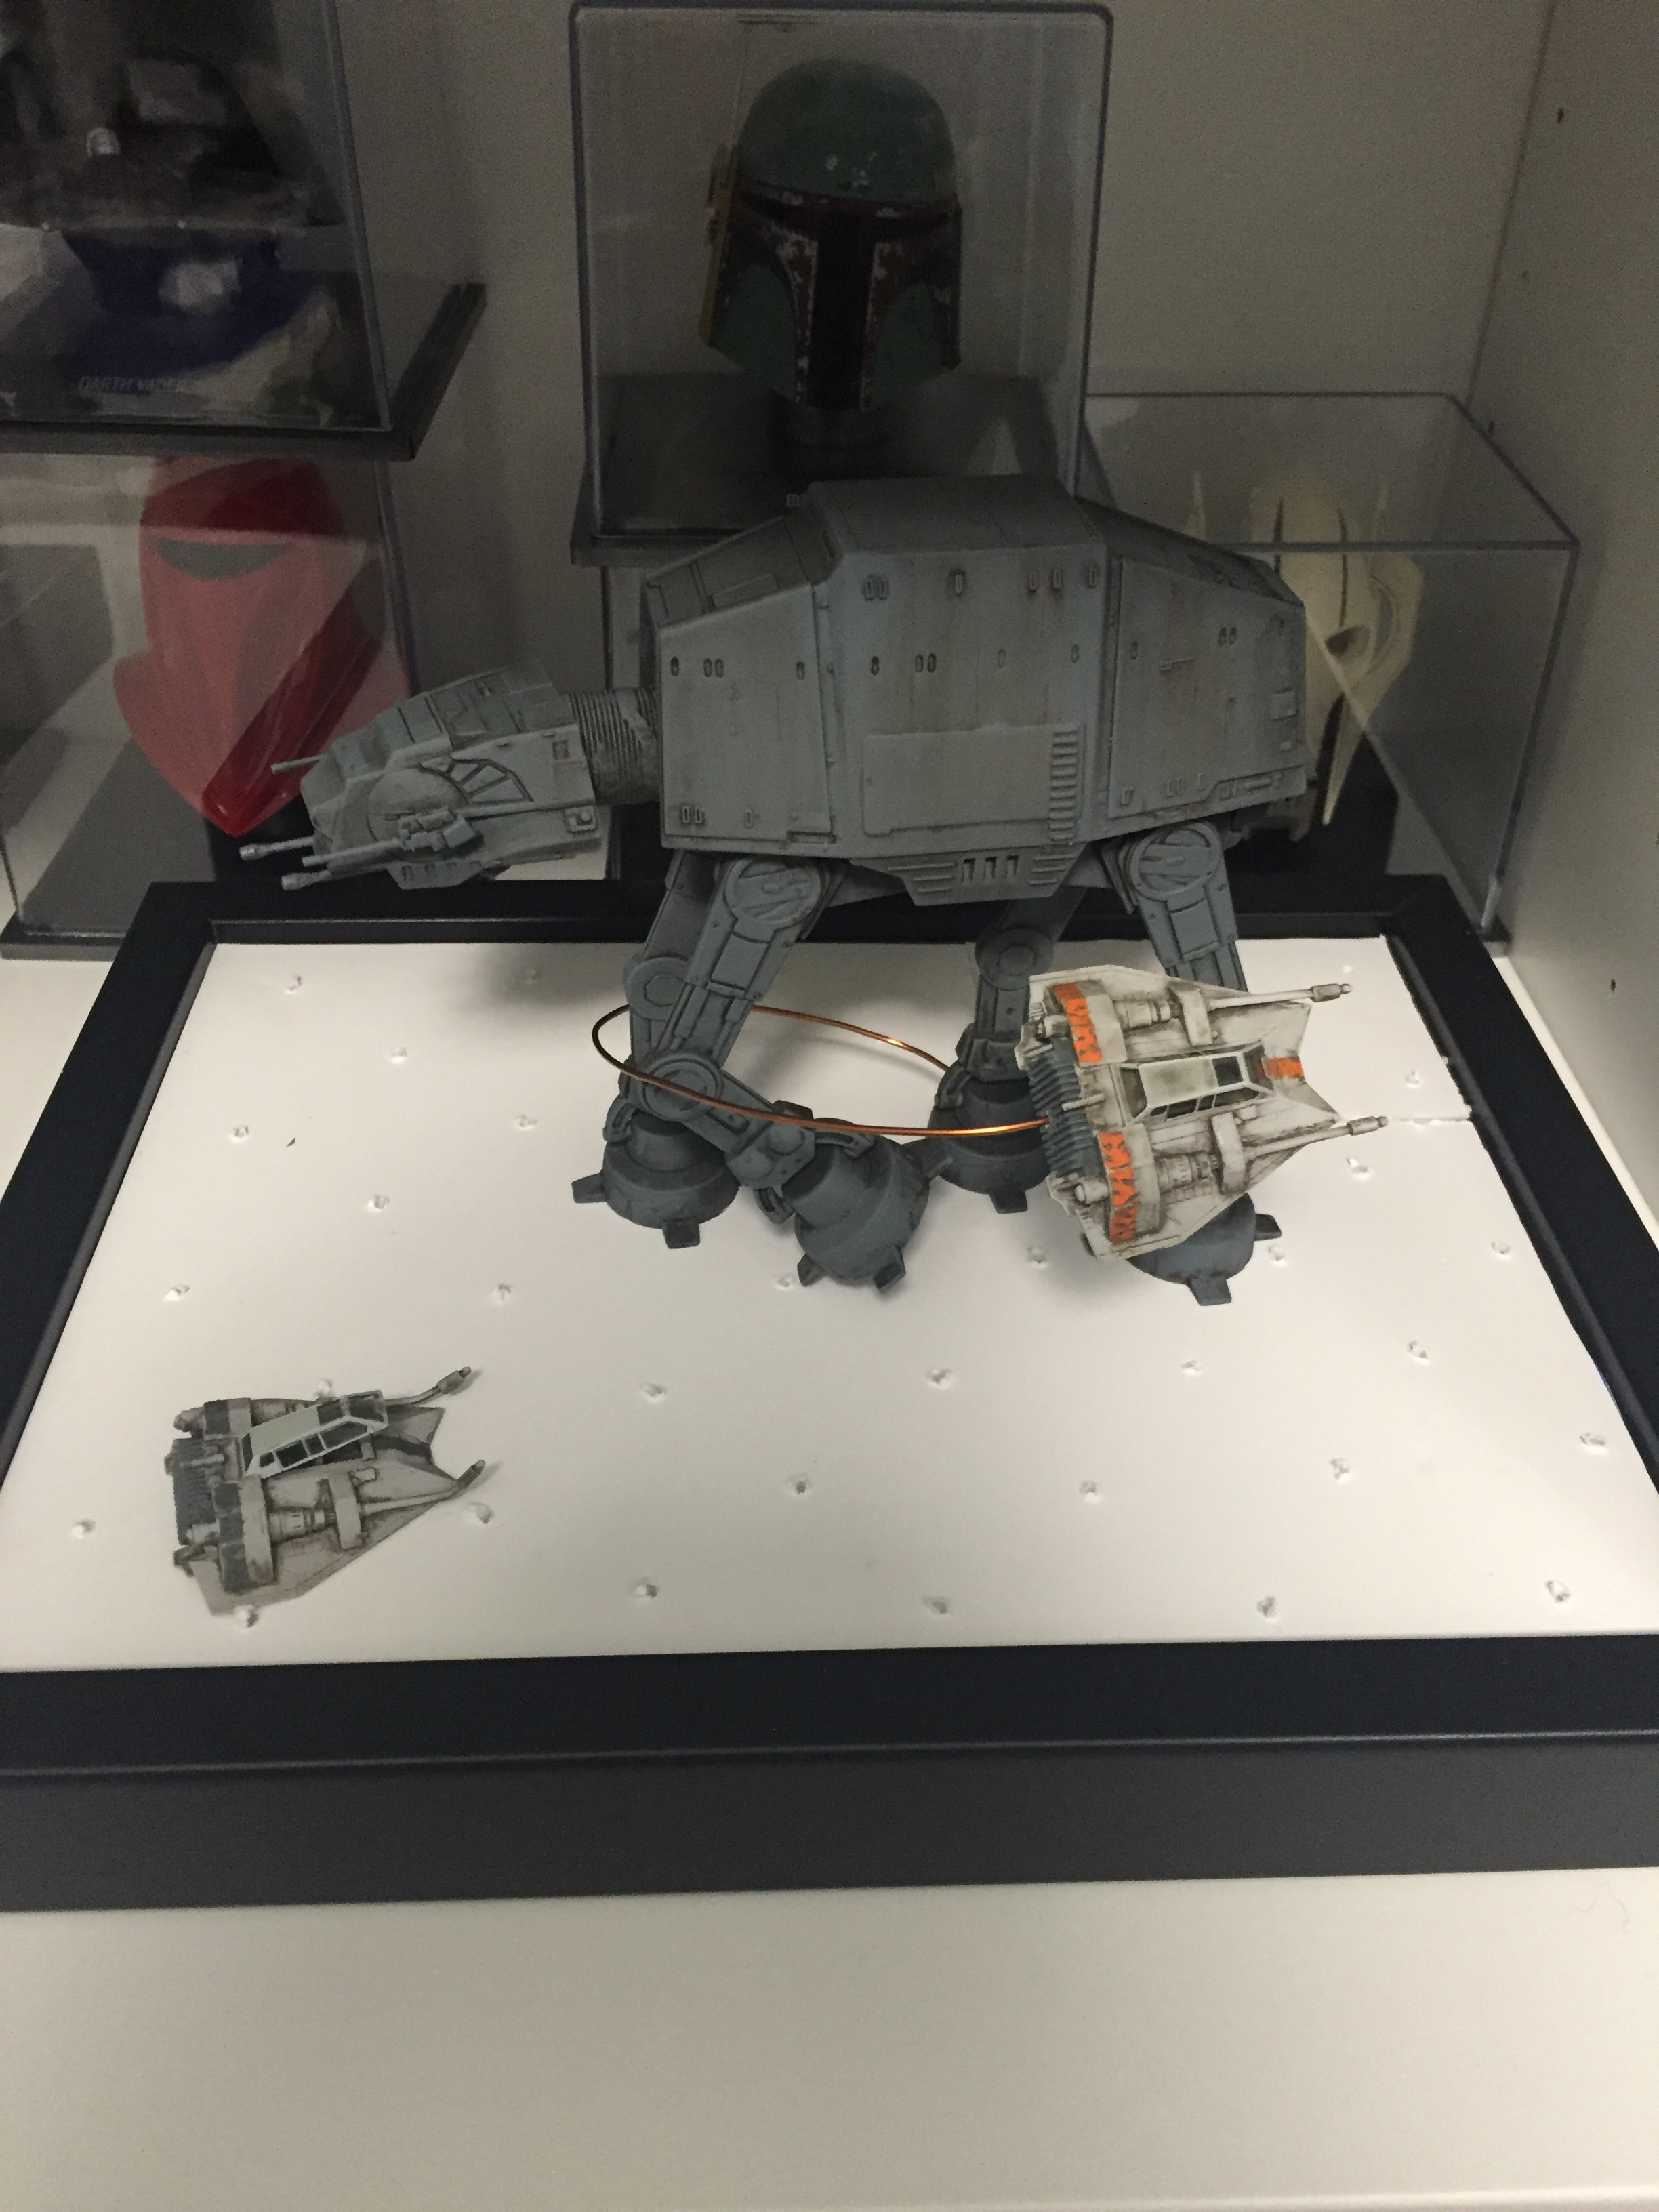
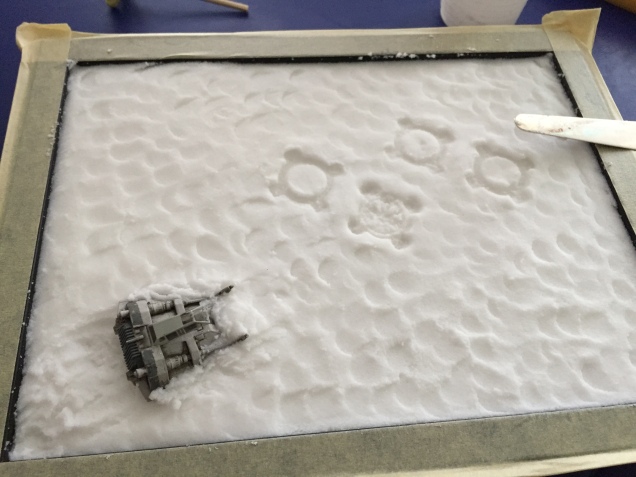
Now it is time to “marry” the AT-AT with the Snowspeeder. I’ve used a piece of copper wire (used for coil windings), drilled one small hole in the AT-AT food and another on the back of the snowspeeder. To give it a bit more strength, I’ve twisted the wire inside the AT-AT food and filled it with hot glue, so it does’t move and provides a stable base. For the crashed snowspeeder, I’ve glued the canopy open and twisted the cannons a little bit for a more damaged look. Below the mock-up before adding the snow.
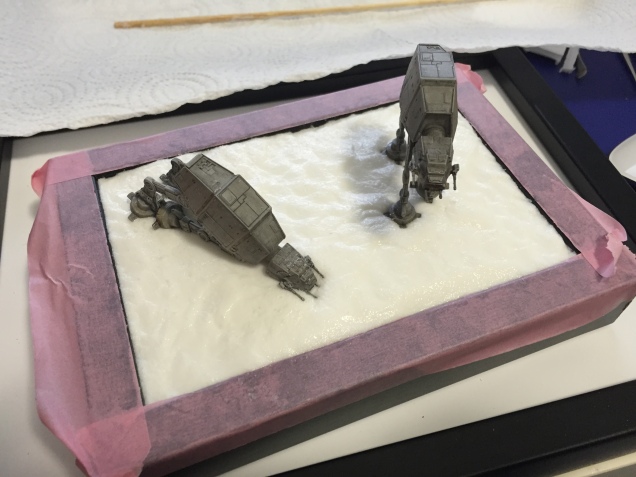
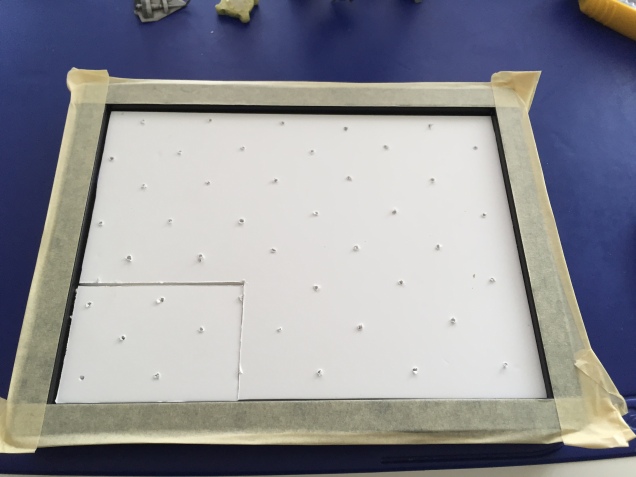
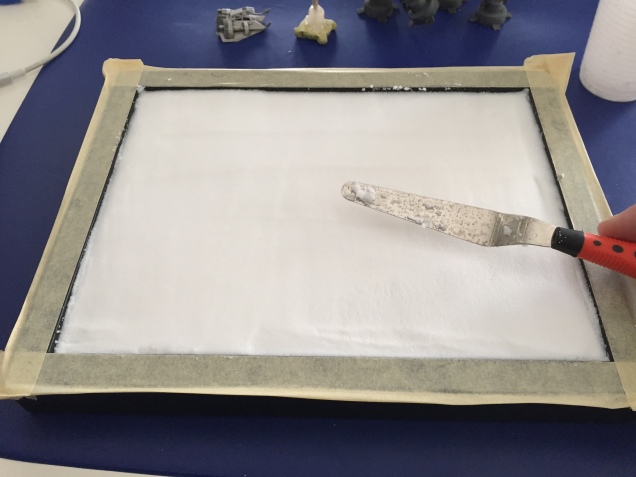
Now the snow part. As before, I fitted a k-line base with some holes in it, to ease the snow drying process. I’ve mixed the snow with the cement (2:1 proportion) and created a first base.
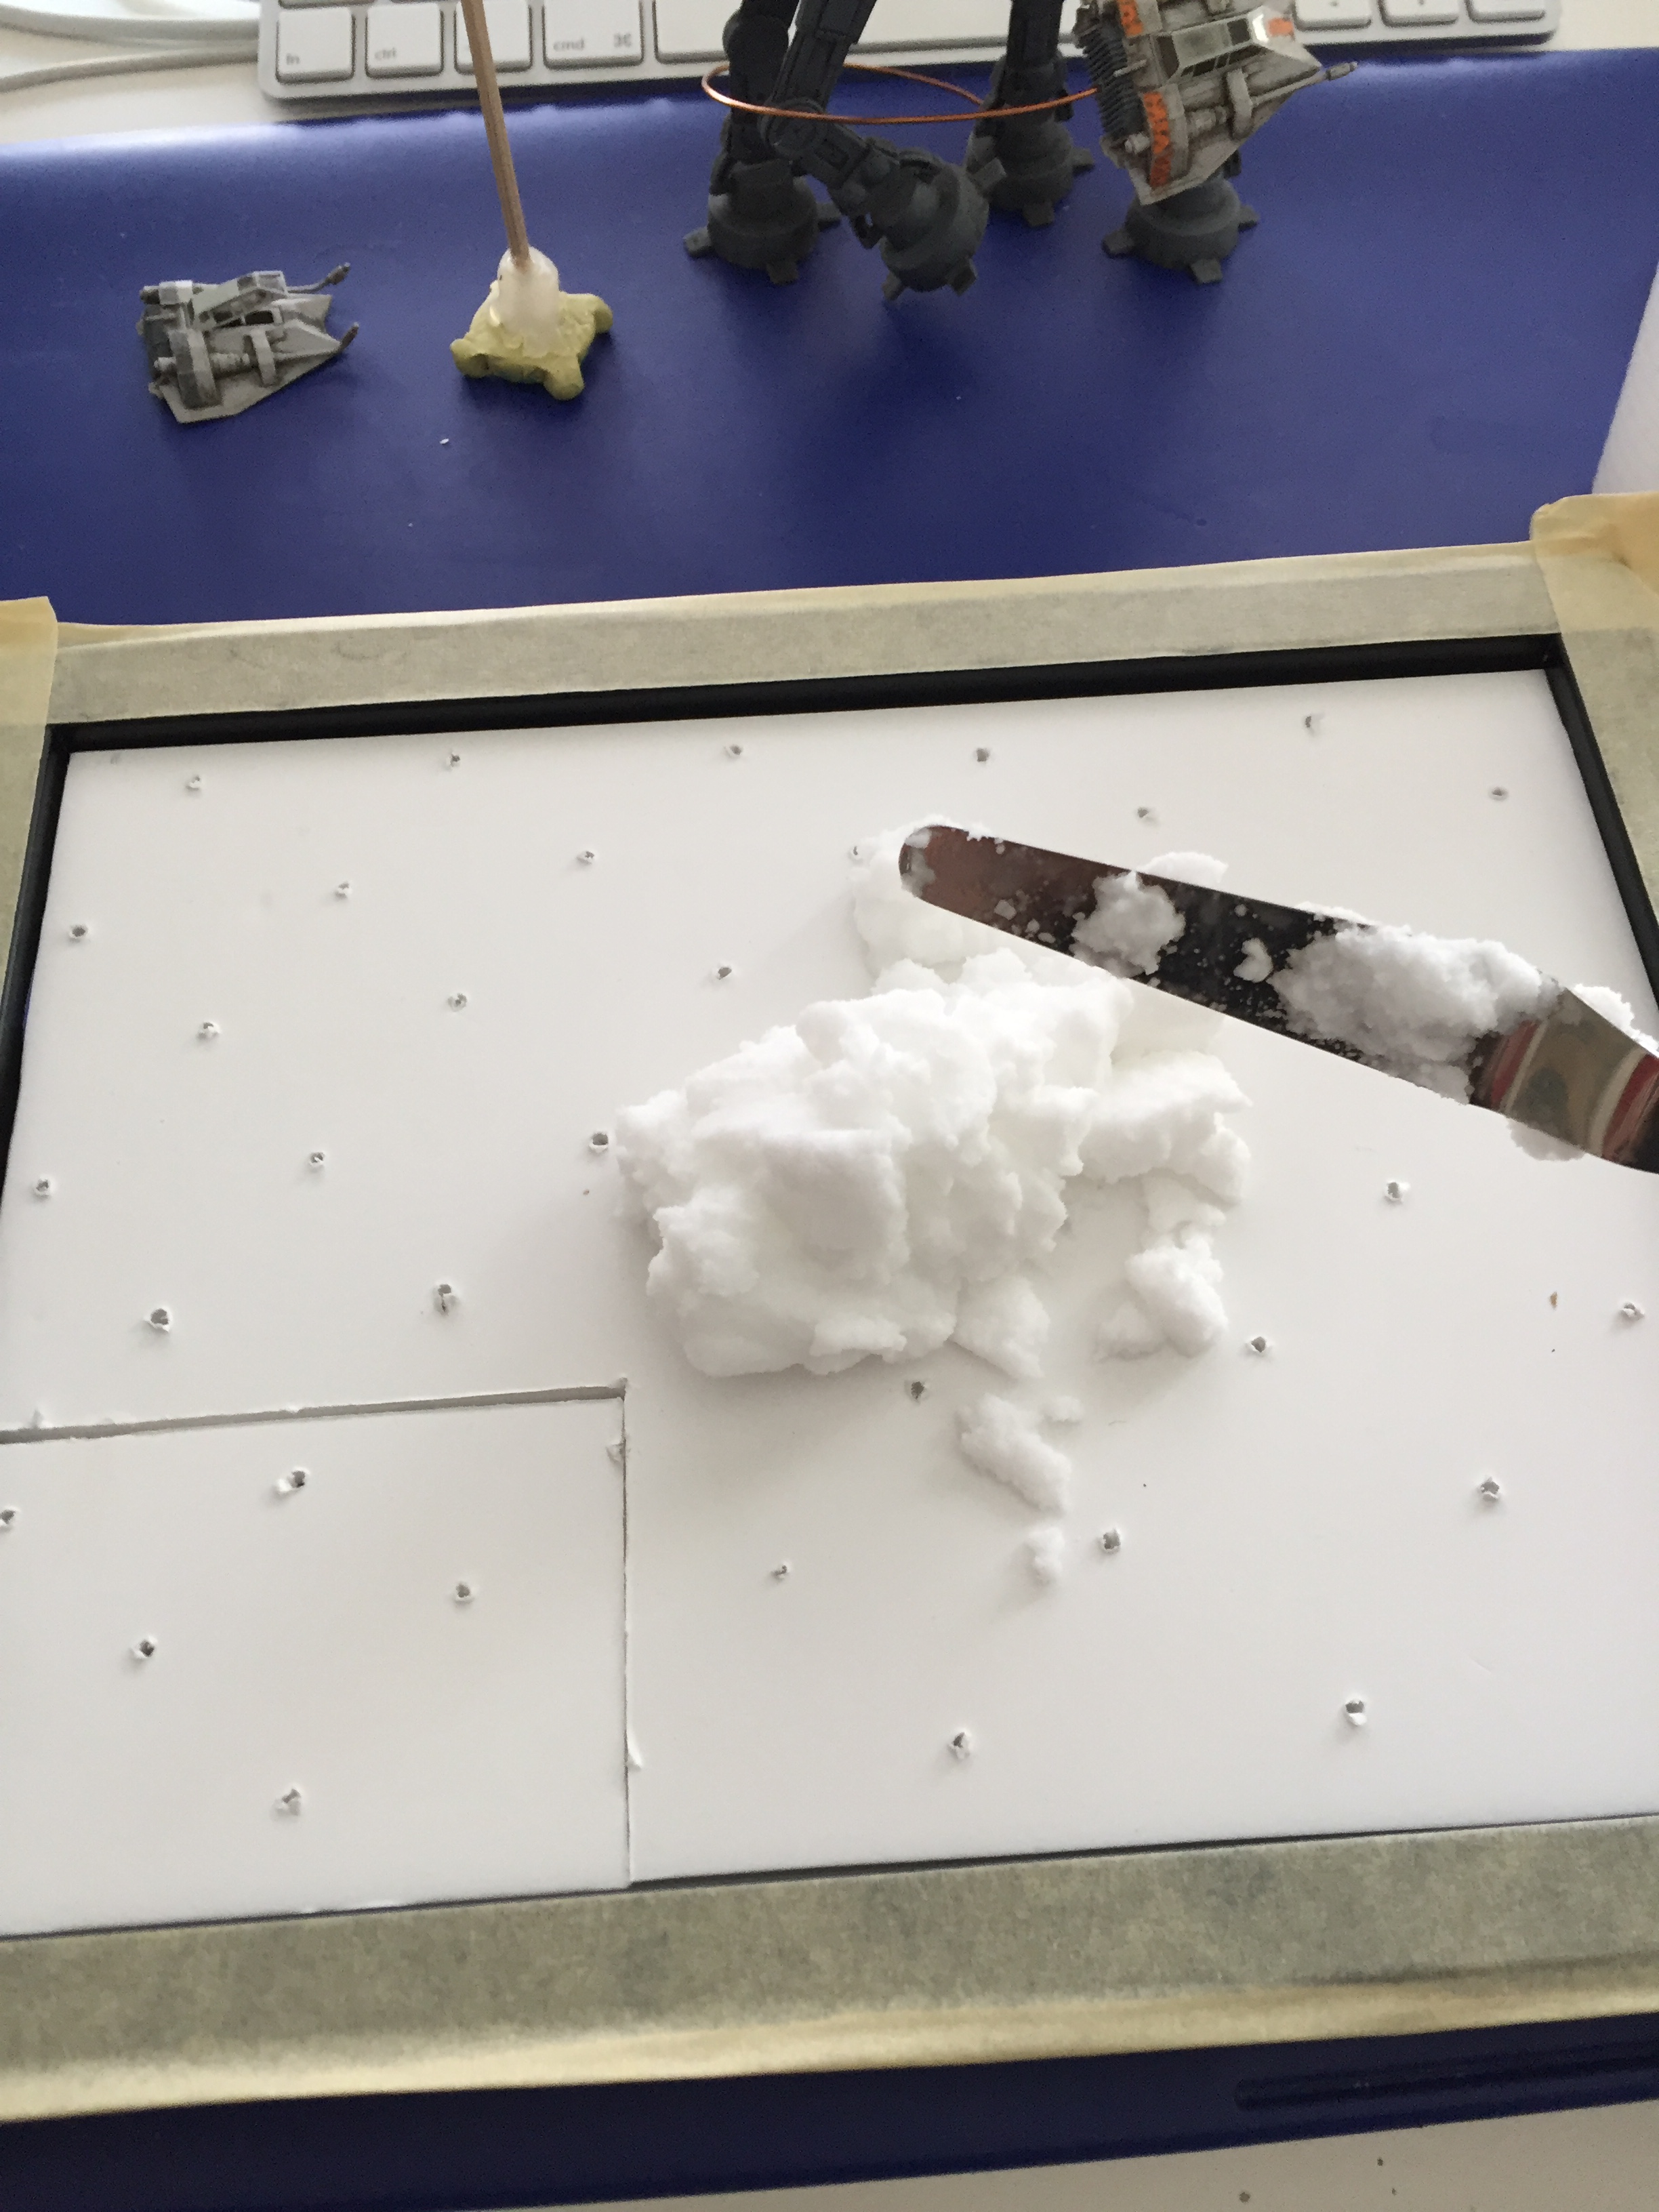
Then, I’ve placed the crashed speeder with some drag marks and added some texture to the snow. I’ve also created a stamp with a bottle cap and some miliput in order to add the raised foot footstep.
After placing the AT-AT in its position and “stamped” the foot mark in the snow, it looked like this.
The drying process took some days, inside my custom-build IKEA BESTA Star Wars cabinet (maybe I’ll post this IKEA hack later). 🙂
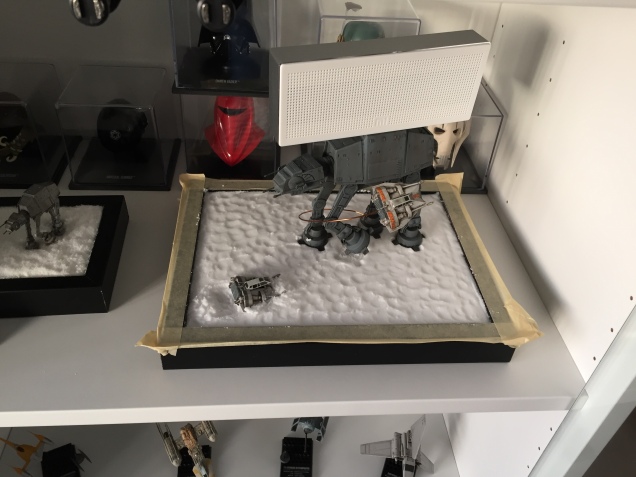
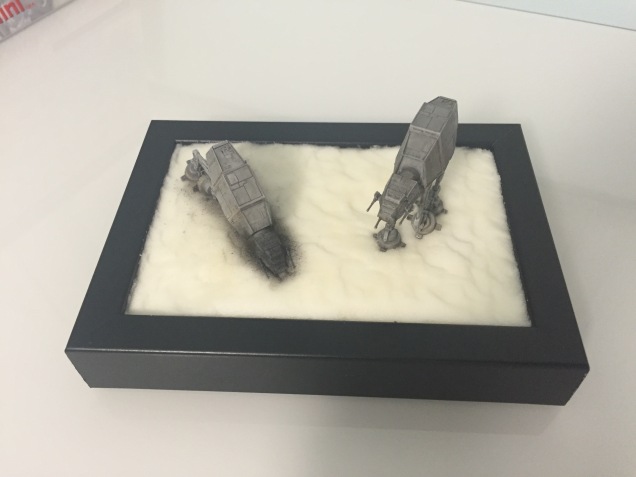
This is the final look of it. Maybe I’ll add some pigments in the crashed speeder in the future, but for now it’s ok.

Take care and be safe out there.
AGT